
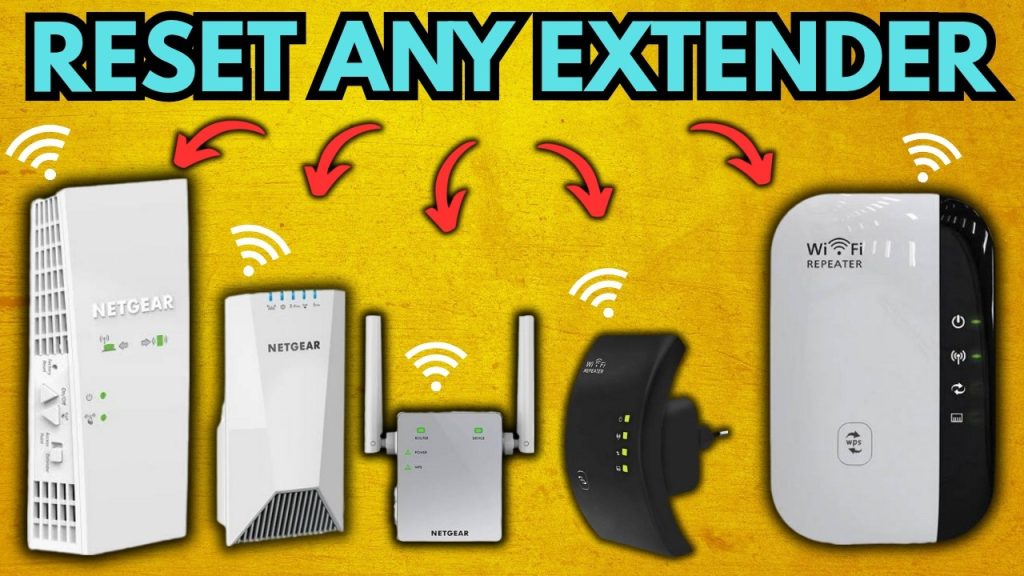
Is your WiFi extender acting up and leaving you with weak or no signal? You’re not alone.
Sometimes, the easiest fix is to reset your WiFi extender. But how exactly do you do that without making things worse? This guide will walk you through simple, step-by-step instructions to reset your device quickly and get your internet connection back on track.
Keep reading—you’ll be amazed at how a quick reset can change everything.
Why Reset Your Wifi Extender
Resetting your wifi extender can fix many common problems quickly. It restores the device to its original settings, clearing any errors. This simple action often improves connection quality and speed. Knowing why to reset helps you maintain a smooth and reliable network at home or work.
Common Issues That Require Reset
- Slow or unstable internet connection
- Extender not connecting to the main router
- Forgotten wifi password or settings
- Frequent disconnections or signal drops
- Firmware or software glitches
- Change in network settings needing a fresh start
Benefits Of Resetting
- Improves wifi speed and stability
- Resolves connection errors quickly
- Removes incorrect or outdated settings
- Restores factory defaults for easier setup
- Helps troubleshoot and isolate issues
- Extends device lifespan by clearing bugs
Credit: topictrick.medium.com
Types Of Wifi Extender Resets
Understanding the different types of WiFi extender resets can save you time and frustration when troubleshooting your connection. Each reset type serves a distinct purpose, from simple reboots to complete system wipes. Knowing which reset to use can help you quickly restore your network without losing important settings.
Soft Reset
A soft reset is like giving your WiFi extender a quick refresh. It usually involves restarting the device without changing any settings. This reset can clear temporary glitches or minor connection issues.
You can perform a soft reset by unplugging the extender, waiting about 10 seconds, and plugging it back in. It’s simple but often effective if your extender suddenly stops working or becomes unresponsive.
Hard Reset
A hard reset goes a bit deeper than a soft reset by rebooting the extender using a specific button or command. This action restarts the device’s hardware and software but keeps your custom settings intact.
For example, some extenders have a reset button that you press briefly to trigger a hard reset. This helps fix more stubborn problems without wiping your saved WiFi passwords or configurations.
Factory Reset
A factory reset wipes all your extender’s settings and returns it to the state it was when you first bought it. This includes removing your WiFi network information, password, and any custom changes.
You typically perform a factory reset by holding the reset button for 10-30 seconds until the device restarts. Use this option only if other resets don’t work or you want to start fresh. Are you ready to lose all your settings to fix a persistent issue?
Preparation Before Reset
Resetting a WiFi extender can fix many connectivity problems. Before you begin, proper preparation is important. It saves time and prevents data loss. Preparing ensures a smooth reset process without surprises.
Take a moment to gather all needed information and back up your settings. This simple step protects your network details and speeds up setup after the reset.
Gather Necessary Information
Collect key details about your WiFi extender. These include:
- Extender model and serial number
- WiFi network name (SSID) and password
- Admin username and password for extender access
- IP address used by the extender
Having these ready helps you reconfigure the extender quickly. It also avoids confusion during the reset.
Backup Settings
Many extenders allow you to save your current settings. Look for a backup option in the extender’s admin panel. Save the backup file to your computer or cloud storage.
This backup keeps your customized settings safe. After the reset, you can restore these settings easily. Without backup, you may need to set up the extender from scratch.
Quick Steps To Reset Wifi Extender
Resetting a WiFi extender can fix connection issues and improve performance. The process is simple and quick. There are several ways to reset your device depending on its features. Choose the method that suits your device and comfort level.
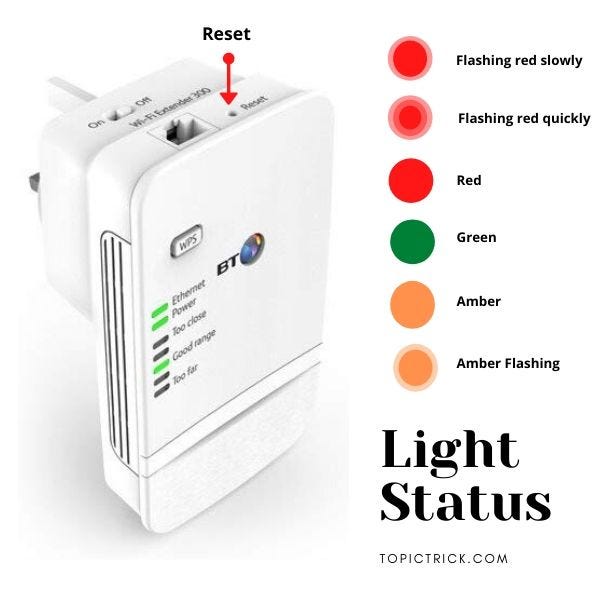
Using Reset Button
Locate the small reset button on your extender. It is usually a tiny hole that needs a pin or paperclip to press. Hold the button for about 10 seconds until the lights blink or turn off. Release the button and wait for the extender to restart. Your extender will return to factory settings.
Reset Via Web Interface
Connect your device to the extender’s network. Open a web browser and enter the extender’s IP address. Log in using your username and password. Find the “Reset” or “Factory Reset” option in the settings menu. Click it and confirm your choice. The extender will reboot and reset automatically.
Reset Through Mobile App
Open the extender’s mobile app on your phone. Sign in or connect to your extender. Navigate to the settings or device management section. Look for the reset or restore option. Tap it and confirm the reset. The app will restart the extender remotely, restoring default settings.
Troubleshooting Reset Issues
Resetting a WiFi extender often solves many connectivity issues, but sometimes you might hit a wall. Troubleshooting reset issues requires patience and a clear approach. Understanding common problems like unresponsive extenders or resets that don’t resolve the issue can save you time and frustration.
Extender Not Responding
If your extender isn’t responding to reset commands, first check the power source. Is the device properly plugged in and turned on? Sometimes, a loose connection or faulty power outlet causes this problem.
Try a different power outlet to rule out power issues. If the extender has a physical reset button, press and hold it firmly for at least 10 seconds—some models need longer. If nothing happens, the reset button might be damaged or the device could be faulty.
Have you checked the extender’s LED lights? They often indicate the device’s status. No lights or unusual blinking patterns can point to hardware failure or firmware corruption, which a simple reset won’t fix.
Reset Not Fixing Problems
Sometimes, resetting your extender doesn’t clear the issues. You might still experience slow speeds, drops, or connection failures. This can be frustrating, but it often means the problem lies beyond a basic reset.
Consider these factors:
- Firmware update:An outdated firmware can cause persistent issues. Check the manufacturer’s website for updates and install the latest version.
- Placement problems:Reset won’t fix poor extender placement. Walls, furniture, or interference might block the signal. Try moving the extender closer to your router or to a more open space.
- Network settings:Incorrect configurations like IP conflicts or wrong SSID/password settings can prevent proper connection. Review and adjust these settings manually.
If you’ve tested all these and still face problems, it may be time to contact customer support or consider replacing the extender. What’s your experience with stubborn extenders? Sometimes, persistence pays off, but knowing when to seek help can save you hours of hassle.

Credit: www.youtube.com
Setting Up Your Extender After Reset
Setting up your WiFi extender after a reset is an essential step to ensure your home or office network reaches every corner. After restoring factory settings, the device forgets all previous configurations and needs to be connected and adjusted again. This process might seem tedious, but it’s straightforward and ensures your extender works efficiently.
Connecting To Network
Once your extender resets, it creates its own default network, usually named after the brand or model. You’ll need to connect your computer or smartphone to this network first. Open your device’s WiFi settings and look for the extender’s network name (SSID).
If you don’t see the network, try moving closer to the extender or restarting its power. Connecting to this default network allows you to access the extender’s setup page through a web browser. This is where you will enter your home WiFi details.
Configuring Settings
After connecting, open a browser and enter the extender’s setup IP address, often something like 192.168.1.250. This opens the login page. Use the default username and password found in the manual or on the device label.
Here, you’ll select your main WiFi network and enter its password. It’s crucial to double-check this information to avoid connection failures. You can also customize the extender’s network name or keep it similar to your main network for seamless roaming.
Don’t skip the security settings—choose WPA2 or WPA3 encryption to keep your network safe. After saving, the extender will reboot and apply these new settings.
Testing Connectivity
Once your extender restarts, reconnect your device to the extended network. Try browsing websites or streaming videos to check the signal strength and speed. If pages load slowly or drop frequently, consider repositioning the extender closer to your router.
Use tools like speed tests or WiFi analyzer apps to measure performance. If the connection is stable and fast, your setup is successful. If not, revisit the configuration page and verify your inputs or try resetting again.
Tips To Maintain Wifi Extender Performance
Maintaining your WiFi extender’s performance is key to enjoying a strong and reliable internet connection throughout your space. Small habits and thoughtful adjustments can make a significant difference in how well your extender works. Let’s look at some practical tips you can apply right now to keep your WiFi extender running smoothly.
Regular Firmware Updates
Firmware updates often include important fixes and improvements that boost your extender’s stability and speed. Check the manufacturer’s website or your extender’s app regularly to see if updates are available. Ignoring updates can leave your device vulnerable to bugs and security risks, so setting a reminder to update at least once every few months is a smart move.
Optimal Placement
Where you place your WiFi extender has a direct impact on its performance. Avoid putting it too far from your main router, or it won’t receive a strong enough signal to extend. Try placing it halfway between your router and the area where the signal is weak, and experiment with heights—sometimes a small shift to a higher shelf can improve coverage significantly.
Avoiding Interference
Electronic devices like microwaves, cordless phones, and baby monitors can interfere with your extender’s signal. Keep your extender away from these sources to reduce signal drops or slow speeds. Also, thick walls or large metal objects can block signals, so consider your home’s layout and avoid placing the extender near these obstacles.

Credit: www.youtube.com
Frequently Asked Questions
How Do I Reset My Wifi Extender To Factory Settings?
To reset your WiFi extender, press and hold the reset button for 10-15 seconds. This restores factory default settings and clears custom configurations.
When Should I Reset My Wifi Extender?
Reset your WiFi extender if it’s unresponsive, has connection issues, or you forgot the login password. Resetting often resolves these problems.
Will Resetting My Wifi Extender Delete Saved Networks?
Yes, resetting removes all saved WiFi networks and passwords. You must reconfigure your extender and reconnect to your wireless network afterward.
How Can I Reset My Wifi Extender Without A Reset Button?
If no reset button exists, check the extender’s app or web interface for a factory reset option. Follow on-screen instructions carefully.
Conclusion
Resetting your WiFi extender is simple and helpful. It fixes common connection problems fast. Just follow the steps carefully and stay patient. After resetting, your device should work better and reach farther. Keep your network running smooth and strong. Try resetting again if issues return.
Stay connected and enjoy better WiFi everywhere in your home.