
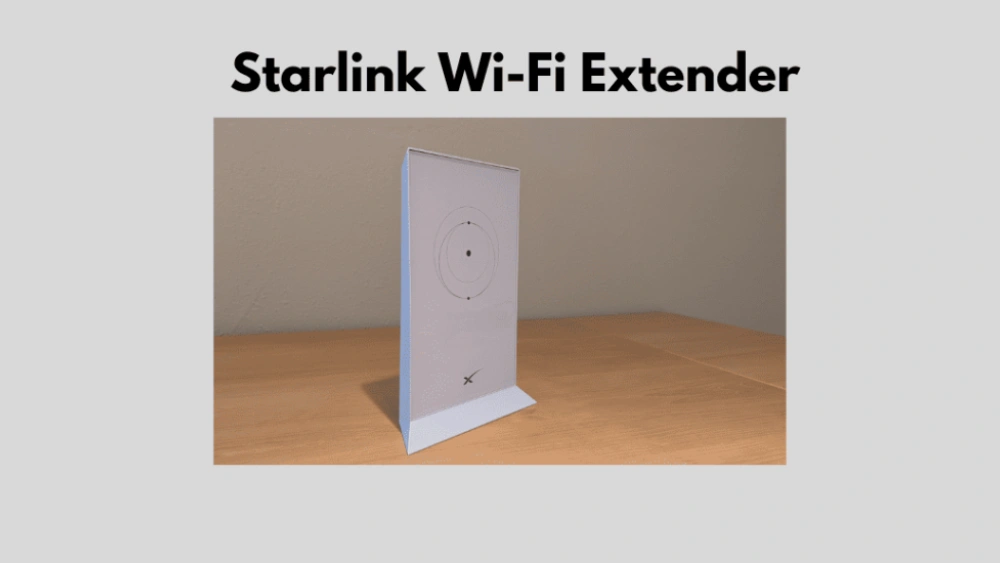
Are you struggling with weak Starlink WiFi signals in some parts of your home or yard? You’re not alone.
Many Starlink users find that their connection doesn’t reach every corner they need. But what if you could boost your WiFi range easily and enjoy faster, more reliable internet wherever you are? This guide will show you simple, practical ways to extend your Starlink WiFi range so you can get the most out of your connection.
Keep reading to discover tips that will transform your online experience.
Starlink Wifi Basics
Starlink provides internet by connecting to satellites in space. It offers fast speeds even in remote places. Understanding how Starlink Wifi works helps improve its range and performance.
Starlink Wifi uses a special dish to send and receive signals. These signals connect with satellites orbiting Earth. The dish then shares internet inside your home through a router.
How Starlink Wifi Works
The Starlink dish communicates directly with satellites above. It sends data from satellites to the dish and then to your devices. The system uses a low Earth orbit network for quick responses.
The dish automatically adjusts to find the best satellite signal. Inside your home, a router creates a Wifi network. Devices like phones or laptops connect to this network for internet access.
Common Range Limitations
Starlink Wifi range depends on the router’s power and obstacles around. Walls and furniture can weaken the signal strength. Distance from the router also affects Wifi speed and quality.
Interference from other electronics or networks may reduce signal range. The dish must have a clear view of the sky for optimal performance. Trees, buildings, or bad weather can block signals.
- Walls and thick barriers reduce Wifi signal
- Distance from router limits connection speed
- Interference from other devices causes disruptions
- Obstructions block satellite signals to the dish

Credit: www.amazon.com
Optimal Router Placement
Optimal router placement plays a crucial role in extending your Starlink WiFi range. Even the best hardware can struggle if the router sits in a poor spot. You want your signal to spread evenly across your home or office without unnecessary blockages or interference.
Choosing Central Locations
Place your router near the center of your living space to maximize coverage. This reduces the distance the signal needs to travel to reach all corners. Think about where you spend most of your time—your router should be nearby to provide strong, consistent WiFi.
For example, putting the router in a hallway or an open area often works better than a corner or behind furniture. If you have a multi-story home, try placing the router on the middle floor to cover both upper and lower levels more effectively.
Avoiding Obstacles And Interference
WiFi signals weaken when they pass through walls, metal, or thick furniture. Avoid placing your router near large appliances, mirrors, or aquariums as these can cause signal drops. Even dense walls can significantly reduce your Starlink WiFi range.
Interference from other electronics like microwaves, cordless phones, or baby monitors can also disrupt your WiFi. Try to keep your router away from these devices. Have you noticed your WiFi slows down when the microwave is on? That’s interference in action.
Experiment with different spots and observe where your connection feels strongest. Sometimes, a small move of just a few feet can make a big difference in performance.
Using Wifi Extenders
Using WiFi extenders is a straightforward way to boost your Starlink WiFi range without changing your existing setup. These devices catch the signal from your Starlink router and rebroadcast it to areas where the signal is weak or missing. If you’ve ever noticed dead spots in your home or garden, a WiFi extender might be the fix you need.
Types Of Wifi Extenders
There are several types of WiFi extenders available, each suited to different needs and setups:
- Repeater Extenders:These pick up your current WiFi signal and repeat it, effectively doubling coverage. They are easy to install and cost-effective but may reduce network speed.
- Mesh Network Extenders:These work as part of a mesh system, creating a seamless network with multiple access points. They maintain consistent speeds but often require compatible hardware.
- Powerline Extenders:These use your home’s electrical wiring to extend your network. If your WiFi struggles to pass through thick walls, this option can bypass obstacles effectively.
Choosing the right type depends on your home layout and where you want better coverage. Do you want something simple or a long-term solution?
Setup Tips For Best Performance
Placing your WiFi extender is crucial. Avoid hidden corners or behind thick walls where the signal is already weak. Position it roughly halfway between your Starlink router and the area with poor coverage.
Use the extender’s app or setup guide to find the optimal spot—it often involves some trial and error. Make sure your extender supports the same WiFi standards as your Starlink router to avoid slowdowns.
Another tip: update the extender’s firmware regularly. This keeps the device running smoothly and improves security.
Have you checked if your extender supports dual-band WiFi? Using both 2.4GHz and 5GHz bands can improve performance based on your needs. Try to minimize interference from other electronics, like microwaves or cordless phones, near your extender.
Mesh Network Solutions
Mesh network solutions offer a smart way to extend Starlink WiFi range. They use multiple devices to create a large, seamless wireless network. This setup improves coverage and reduces dead zones in homes or offices. Mesh systems work well with Starlink by spreading the internet signal evenly. You can move freely without losing connection. It is ideal for large spaces or buildings with many walls.
Benefits Of Mesh Systems
- Wide coverage that reaches every corner of your space
- Consistent WiFi speed throughout the network
- Easy to set up and manage via apps
- Automatic connection to the strongest signal point
- Scalable by adding more nodes as needed
- Reduces WiFi dead zones significantly
Compatible Mesh Options For Starlink
Starlink works best with mesh routers that support Ethernet backhaul. This connection ensures fast and stable communication between nodes. Popular mesh systems for Starlink include:
- Google Nest Wifi – simple and reliable with good coverage
- Netgear Orbi – strong performance with dedicated backhaul
- TP-Link Deco – budget-friendly with easy setup
- Eero Pro – user-friendly with good app controls
Choose mesh systems that support wired connections to avoid wireless signal loss. Connect the primary mesh router directly to the Starlink router. Place additional nodes around your space for full coverage.
Upgrading Hardware
Upgrading hardware can boost your Starlink WiFi range significantly. The right equipment improves signal strength and coverage. It helps overcome obstacles and interference that block signals. Focus on high-quality devices to get the best results.
High-gain Antennas
High-gain antennas focus the WiFi signal in a specific direction. This increases signal strength over longer distances. They reduce signal loss and improve connection stability. These antennas work well in large homes or outdoor areas.
Choose antennas compatible with Starlink routers. Look for options with a gain of 9 dBi or higher. Installing antennas at a height without obstructions enhances their performance. Proper alignment toward your devices or open spaces is important.
Advanced Routers For Range
Advanced routers offer better range than standard models. They support dual-band or tri-band frequencies for less crowded signals. These routers handle multiple devices without slowing down the network.
Features like beamforming direct WiFi signals to devices. This boosts speed and connection quality. Look for routers with strong processors and more antennas. A router with external antennas usually provides better coverage.
Placing the router in a central, elevated spot also improves range. Upgrading to a mesh WiFi system can cover larger areas evenly. It uses multiple devices to spread the signal throughout your home.
Adjusting Network Settings
Adjusting your network settings can significantly boost the range and reliability of your Starlink WiFi. Small changes in configuration often create noticeable improvements in signal strength and speed. Let’s look at how you can tweak these settings for a better connection.
Choosing Optimal Wifi Channels
Your Starlink router automatically picks a WiFi channel, but it might not always be the best one. Channels can get crowded, especially if you live in an apartment or dense neighborhood. This crowding causes interference, which weakens your signal.
Access your router’s settings and scan for less crowded channels. You’ll usually find this option under “Wireless Settings” or “Advanced.” Switching to a channel with fewer devices can reduce interference and extend your WiFi range.
Try channels 1, 6, or 11 on the 2.4 GHz band, as they don’t overlap. For 5 GHz, pick a channel with the least traffic. Have you ever noticed your WiFi gets slower at certain times? This simple switch might be why.
Enabling Qos For Stability
Quality of Service (QoS) prioritizes traffic on your network, which is crucial when multiple devices compete for bandwidth. Without QoS, your video calls, gaming, or streaming might suffer, especially at the edge of your WiFi range.
Turn on QoS in your router’s settings to assign priority to important devices or applications. For example, prioritize your laptop if you work from home, or your smart TV during movie nights. This ensures a stable and consistent connection even when your WiFi signal isn’t at its strongest.
Have you ever experienced buffering during a live stream? QoS can help prevent this by managing network traffic smartly, making your Starlink WiFi feel more reliable across your entire home.
Using Wired Connections
Using wired connections is a smart way to boost your Starlink WiFi range without compromising speed or reliability. Unlike wireless extenders that can weaken the signal, wired setups maintain strong, consistent connections throughout your home or office. If you’ve noticed dead zones or slow speeds far from your Starlink router, wiring can be the solution you need.
Ethernet Backhaul For Extenders
Ethernet backhaul means connecting your WiFi extenders directly to your Starlink router using Ethernet cables. This setup avoids the common issue of extenders repeating weak wireless signals and instead gives them a solid, high-speed connection.
Here’s why this matters: when your extender uses Ethernet backhaul, it can deliver faster speeds and better coverage to far corners of your space. You can run Ethernet cables through walls, floors, or even use flat cables along baseboards, keeping them neat and out of sight.
Think about your home office or streaming room—does your WiFi slow down there? Plugging an extender into the router with an Ethernet cable can turn that frustration into a smooth, lag-free experience.
Powerline Adapters As Alternatives
If running Ethernet cables isn’t practical, powerline adapters offer a clever alternative. These devices send internet signals through your home’s electrical wiring, turning any power outlet into a network connection point.
Powerline adapters are easy to set up: plug one near your Starlink router and connect it with an Ethernet cable, then plug the other in the room where you need better WiFi coverage. This method often provides faster and more stable connections than wireless extenders alone.
Keep in mind, the quality of your home’s electrical wiring affects performance. Have you checked how old your wiring is? Newer wiring usually means better speeds with powerline adapters. It’s a simple way to extend your Starlink WiFi without drilling or running long cables.
Environmental Factors
Environmental factors play a big role in extending Starlink WiFi range. The signal travels through air and can be blocked or weakened by weather and land features. Understanding these factors helps improve your connection strength and coverage.
Impact Of Weather And Terrain
Weather conditions like rain, snow, and fog can reduce Starlink signal strength. Moisture in the air absorbs or scatters the signal, making it weaker.
Terrain also affects WiFi range. Hills, trees, and buildings block or reflect the signal. Open areas allow the signal to travel farther with less loss.
- Heavy rain or snow lowers signal quality
- Dense forests can block the WiFi signal
- High hills or mountains create dead zones
- Clear, flat land improves signal reach
Reducing Signal Blockage
Place the Starlink dish in a high, clear spot. Avoid obstacles like walls, roofs, or large trees between the dish and sky.
Trim branches or remove objects that block the line of sight. Even small obstructions cause signal loss.
Use a mounting pole or roof mount to lift the dish higher. This helps reduce blockage and increases WiFi range.
- Choose a location with an open view of the sky
- Clear branches or objects near the dish
- Elevate the dish using poles or mounts
- Keep the dish away from reflective surfaces
Monitoring And Testing Signal
Monitoring and testing your Starlink WiFi signal is key to getting the best coverage and speed. Without checking your signal regularly, you might miss weak spots or interference that slow down your connection. Tracking signal quality helps you make smart adjustments and boosts your online experience.
Apps And Tools For Wifi Analysis
Several apps make it easy to analyze your WiFi signal right from your phone or laptop. Tools like NetSpot, WiFi Analyzer(for Android), and inSSIDerprovide detailed maps and signal strength readings. These apps show you where your signal is strongest and where it drops off.
Using these apps, you can walk around your home or office to spot dead zones. They also reveal interference from other networks or devices, which can help you change your router’s position or channel. Have you tried any WiFi analyzer app before? You might be surprised how much the signal varies in different rooms.
Interpreting Signal Strength Data
Signal strength is usually measured in dBm, and the closer to 0, the better the signal. A typical strong WiFi signal might be around -50 dBm, while anything below -70 dBm could cause slow speeds or dropped connections. Understanding these numbers helps you decide if you need to move your Starlink dish or add WiFi extenders.
Look beyond just the signal strength. Check for signal-to-noise ratio (SNR) if your tool provides it. A high SNR means your signal is clear, while a low SNR suggests interference is affecting your connection quality.
Next time you test your WiFi, ask yourself: Does the signal drop when I move to a certain spot? Could a small adjustment in placement fix my slow areas? These insights can turn guesswork into action for a stronger Starlink network.

Credit: www.amazon.com

Credit: www.reddit.com
Frequently Asked Questions
How Can I Boost Starlink Wifi Signal Strength?
To boost Starlink WiFi, place the router centrally and high. Remove obstacles and use WiFi extenders or mesh systems. Update firmware regularly for optimal performance and stronger signal reach.
What Devices Help Extend Starlink Wifi Range Effectively?
WiFi range extenders, mesh WiFi systems, and powerline adapters effectively extend Starlink WiFi range. Choose devices compatible with Starlink for seamless connectivity and improved coverage throughout your home or office.
Does Starlink Support External Antennas For Range Extension?
Starlink doesn’t officially support external antennas. However, some users experiment with third-party directional antennas to boost signal strength. Use caution, as this may void warranty and affect service quality.
How Does Router Placement Impact Starlink Wifi Coverage?
Router placement greatly impacts WiFi coverage. Place the Starlink router in an open, central location, away from walls and metal objects. Higher placement reduces interference and improves signal distribution.
Conclusion
Extending your Starlink WiFi range can improve your internet experience. Place the router in an open, central spot for better coverage. Remove obstacles like walls and furniture that block signals. Consider using WiFi extenders or mesh systems to spread the signal.
Regularly update your Starlink device for best performance. Small changes can make a big difference in your connection. Stay patient and test different setups to find what works best. Enjoy faster, more reliable internet throughout your home or office.