
Have you ever reached for your favorite mug only to find it chipped? It’s frustrating when something you use every day gets damaged.
But before you toss it away, know this: you can fix that chip and bring your mug back to life. You’ll discover simple, effective ways to repair your chipped mug quickly and safely. Keep reading, and you’ll learn easy tricks that save money and keep your favorite cup in your hands longer.
Don’t let a small chip spoil your daily coffee or tea—let’s fix it together!

Credit: www.reddit.com
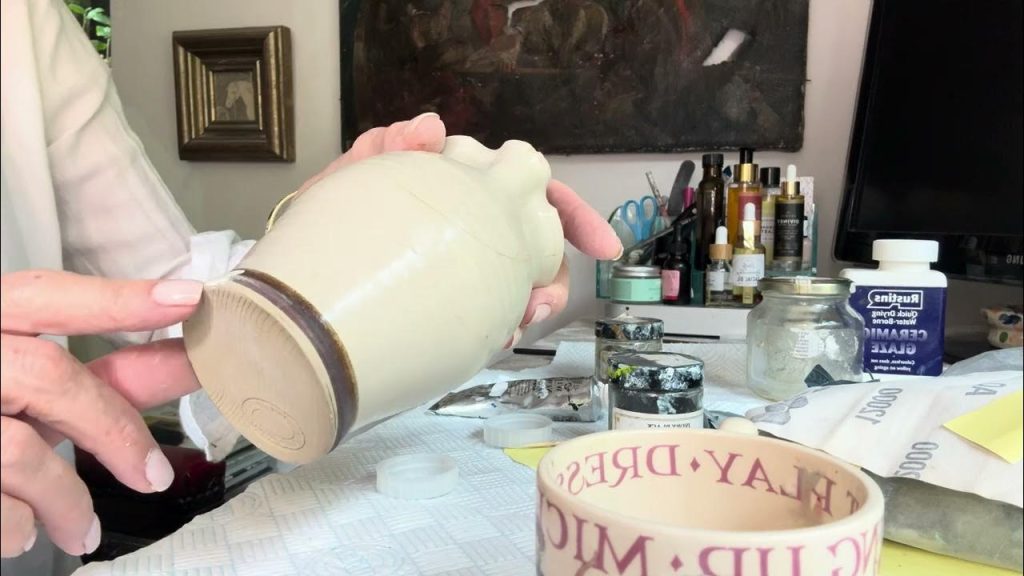
Assess The Damage
Before fixing a chipped mug, start by assessing the damage carefully. This helps decide the best repair method and ensures safety. A close look reveals the extent of the chip and any hidden issues.
Identify The Type Of Chip
Check the size and shape of the chip. Is it a small nick on the rim or a larger piece missing? Small chips can often be smoothed out or filled. Large chips may need stronger repair or replacement. Note whether the chip affects the mug’s usability or just its look.
Check For Cracks Or Weak Spots
Look beyond the chip for cracks. Tap gently around the chip and listen for changes in sound. A dull sound may mean hidden cracks. Run your finger over edges to feel for roughness or weak spots. Cracks can grow and cause the mug to break further. Knowing their presence helps avoid accidents.
Gather Repair Materials
Before you begin fixing your chipped mug, it’s important to gather the right repair materials. Having everything ready will save you time and prevent frustration during the process. Plus, the materials you choose will determine how strong and lasting your repair will be.
Choose The Right Adhesive
Not all glues work well on ceramics. You want an adhesive that bonds firmly and dries clear to keep your mug looking good. Epoxy resin is a top choice because it creates a strong, waterproof seal. Super glue (cyanoacrylate) can also work for small chips, but it may not hold up as well under frequent washing.
Think about how you use your mug. Do you want it dishwasher safe, or will handwashing be enough? This helps you pick the best glue. Have you ever tried fixing something only to have the glue fail the next day? Picking the right adhesive upfront saves you from that hassle.
Prepare Cleaning Supplies
Clean surfaces are key for a successful repair. Dirt or grease can stop the adhesive from sticking properly. You’ll need rubbing alcohol or warm soapy water, a soft cloth, and a small brush or cotton swabs.
Carefully clean the chipped area and the broken piece itself. Make sure to remove any loose bits or dust. This step is often overlooked, but skipping it can cause your repair to fall apart quickly.
Prepare The Mug
Before you jump into fixing a chipped mug, getting it ready is crucial. Proper preparation ensures the repair material sticks well and the final result looks neat. Taking your time with this step can save you frustration later.
Clean The Affected Area
Start by washing the chipped area with warm, soapy water. This removes any dirt, oils, or leftover drink stains that could prevent the glue or filler from bonding properly.
Use a soft brush or cloth to gently scrub the chip. Avoid harsh cleaners, as they might damage the mug’s surface further.
Rinse thoroughly and inspect the chip closely. Does it still look greasy or dusty? If yes, repeat the cleaning until it’s spotless.
Dry And Sand The Chip
After cleaning, dry the mug completely with a lint-free towel. Moisture can weaken adhesives, so this step isn’t optional.
Next, lightly sand the chipped edges using fine-grit sandpaper (around 220 grit). This smooths rough surfaces and helps the repair material grip better.
Be gentle—you want to create a slightly rough texture, not deepen the chip. Have you noticed how small changes in prep affect the repair’s strength? This is why sanding matters.
Apply The Repair
Applying the repair is a crucial part of fixing a chipped mug. It restores the mug’s shape and prevents further damage. Using the right materials ensures the mug is safe to use again. Follow simple steps to make the repair strong and lasting.
Use Epoxy Or Ceramic Glue
Choose a clear, food-safe epoxy or ceramic glue for best results. Clean the chipped area thoroughly before applying glue. Use a small brush or toothpick to spread the glue evenly. Press the chipped piece firmly into place. Hold it steady for a few minutes to bond well. Let the glue cure completely, following package instructions. This creates a strong hold and prevents the chip from falling off again.
Fill Small Chips With Food-safe Putty
For tiny chips without missing pieces, food-safe putty works well. Clean and dry the chipped spot thoroughly first. Use a small tool or toothpick to press putty into the chip. Smooth the surface gently to match the mug’s curve. Allow the putty to dry and harden as directed. Sand lightly if needed for an even finish. This method fills small gaps and protects the mug from cracks.
Smooth And Finish
Repairing a chipped mug can be satisfying. After fixing the chip, the mug needs a smooth finish. This step ensures the mug looks neat and feels comfortable in your hand. Pay attention to detail here to achieve a polished result.
Sand The Repair Surface
Use fine-grit sandpaper for this task. Lightly sand the area where you repaired the chip. Make gentle, circular motions to blend the repair with the rest of the mug. This helps to remove any rough edges. Ensure the surface is smooth before proceeding.
Paint Or Seal For A Polished Look
Choose a suitable paint or sealant for your mug. Match the color closely to maintain the mug’s original look. Apply the paint or sealant evenly over the repaired area. Use a small brush for precision. Allow it to dry completely. This step gives the mug a polished finish and protects the repair.

Credit: www.reddit.com
Drying And Curing Tips
Fixing a chipped mug is only half the battle; the drying and curing process determines how strong and lasting your repair will be. Rushing this stage can undo all your hard work, leading to weak bonds or further damage. Paying attention to the right drying and curing methods ensures your mug stays functional and safe to use.
Set Proper Drying Time
After applying glue or epoxy, let your mug rest undisturbed for the recommended drying time—usually at least 24 hours. Patience here makes a big difference; even if the chip looks fixed, the adhesive needs time to fully harden.
If you’re in a hurry, remember that shorter drying times often mean weaker repairs. I once tried to speed up drying by handling my mug too soon, and it cracked again. Don’t let this happen to you—wait and give it the full cure time.
Avoid Heat And Water During Cure
Heat and moisture can interfere with the curing process. Keep your mug in a dry, room-temperature spot away from direct sunlight, heaters, or steam.
Washing the mug before the adhesive fully cures can weaken the bond. Imagine your mug as a delicate project that needs to stay dry and stable to set properly.
Try to avoid placing the mug in the dishwasher or submerging it in water for at least 48 hours after repair. This will help the adhesive reach its maximum strength and durability.
Safety And Maintenance
Safety and maintenance are crucial when fixing a chipped mug. A damaged mug can harbor germs or cause cuts. Proper care helps extend the mug’s life and keeps it safe for daily use.
Check For Food Safety
Inspect the chipped area carefully. Small cracks or sharp edges can trap bacteria. If the chip is large or creates a rough surface, avoid using the mug for hot drinks. Some glues or fillers used to fix chips may not be food safe. Use only materials labeled as food safe for repairs. Always wash the mug thoroughly after fixing to remove any residues.
Care Tips To Prevent Future Chips
- Handle mugs gently to avoid accidental drops.
- Do not stack mugs tightly in cupboards.
- Use soft sponges or cloths for cleaning.
- Avoid sudden temperature changes, like pouring boiling water into a cold mug.
- Store mugs in a safe place away from edges.
Regular care reduces the chance of chips and cracks. Treat your mugs with care to keep them safe and durable.

Credit: www.youtube.com
Frequently Asked Questions
How Can I Fix A Chipped Mug At Home?
You can fix a chipped mug using food-safe epoxy or ceramic glue. Clean the chip, apply glue carefully, and let it dry fully. This method restores the mug’s look and prevents further damage.
Is It Safe To Use A Repaired Chipped Mug?
Yes, if you use food-safe adhesive and seal the chip properly. Avoid using toxic glues. Always check for sharp edges before use to ensure safety.
What Materials Are Best To Repair Chipped Mugs?
Food-safe epoxy, ceramic glue, or porcelain repair kits work best. These adhesives bond strongly and are safe for items that hold beverages.
Can I Prevent Mugs From Chipping In The Future?
Handle mugs gently, avoid stacking them tightly, and use cushioned storage. Regularly inspect mugs to catch and fix small chips early.
Conclusion
Fixing a chipped mug can save money and reduce waste. Small cracks or chips do not always mean throwing the mug away. With simple steps and basic materials, you can repair it at home. Take your time and follow safety tips to avoid injury.
A fixed mug can still hold your favorite drinks safely. Try these easy methods to bring your mug back to life. Keep your mugs longer and enjoy every sip without worry.