
Struggling to connect your Swann DVR to your WiFi router without using a cable? You’re not alone, and the good news is—it’s easier than you think.
Imagine cutting the clutter of wires while still keeping your security system up and running smoothly. In this guide, you’ll discover simple, step-by-step methods to get your Swann DVR online wirelessly. By the end, you’ll feel confident managing your setup without needing extra tools or tech skills.
Ready to free your space and boost your security? Let’s dive in and make your connection seamless.
Swann Dvr Wireless Setup Basics
Setting up your Swann DVR to connect wirelessly to your WiFi router can simplify your home security system. Cutting the cable means fewer wires to manage and greater flexibility in camera placement. Understanding the basics of wireless setup helps you avoid common pitfalls and get your system up and running smoothly.
Requirements For Wireless Connection
To connect your Swann DVR to a WiFi router without cables, you need a few key things:
- Stable WiFi Network:Ensure your router broadcasts a strong and consistent 2.4GHz signal, as most Swann DVRs don’t support 5GHz.
- Correct Network Credentials:Have your WiFi network name (SSID) and password ready to enter during setup.
- Swann DVR with Wireless Capability:Not all models support wireless connections; double-check yours.
- Power Supply:Your DVR and router must be powered on and within range to communicate effectively.
Without these essentials, wireless setup might fail or result in unstable connections. Have you checked your WiFi signal strength near your DVR location?
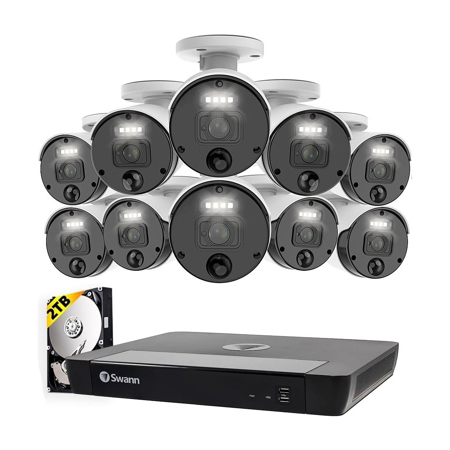
Compatible Swann Dvr Models
Not every Swann DVR model can connect wirelessly. Here are some popular models that support WiFi setup:
| Model | Wireless Capability | Notes |
|---|---|---|
| SWDVK-445804 | Yes | Supports 2.4GHz WiFi, easy setup via app |
| SWDVK-845804 | Yes | Includes wireless NVR and cameras |
| SWNVK-835804 | Yes | Wireless NVR with HD recording |
| Older DVR Models | No | Require Ethernet cable only |
If your model isn’t listed here, you might still be able to connect wirelessly using a WiFi bridge or extender. Have you explored your model’s manual or Swann’s support site for wireless options?

Credit: www.youtube.com
Preparing Your Router And Dvr
Getting your Swann DVR ready to connect wirelessly starts with preparing both your router and the DVR itself. This preparation ensures a smooth connection process and avoids common issues like signal drops or failed connections. Let’s look at how you can set up your equipment properly for a cable-free experience.
Check Router Settings
First, access your router’s settings by typing its IP address into a web browser. Most routers use addresses like 192.168.0.1or 192.168.1.1. You’ll need the admin username and password—check your router’s label if you haven’t changed these.
Look for the Wi-Fisection to confirm your network name (SSID) and password. Make sure your router is broadcasting on a 2.4 GHz band, as most Swann DVRs don’t support 5 GHz. Also, check if MAC address filtering is enabled; if it is, you’ll need to add your DVR’s MAC address to allow it to connect.
Is your router’s firmware up to date? Running the latest firmware can prevent many wireless connection problems. You can usually find a firmware update option within the router’s admin panel.
Power On And Reset Dvr
Before connecting, power on your Swann DVR and let it fully boot up. This step ensures the device initializes its wireless module properly. If you’ve tried connecting before and faced issues, a reset can clear any old settings that might interfere.
To reset, locate the reset button—often a small pinhole on the back or bottom of the DVR. Hold it down for about 10 seconds using a paperclip or similar tool. This action restores factory settings, giving you a clean slate to start your wireless setup.
After resetting, check the DVR’s display or menu for wireless setup options. You should see your router’s network name appear when the DVR scans for available Wi-Fi. If not, double-check that your router is powered on and broadcasting correctly.
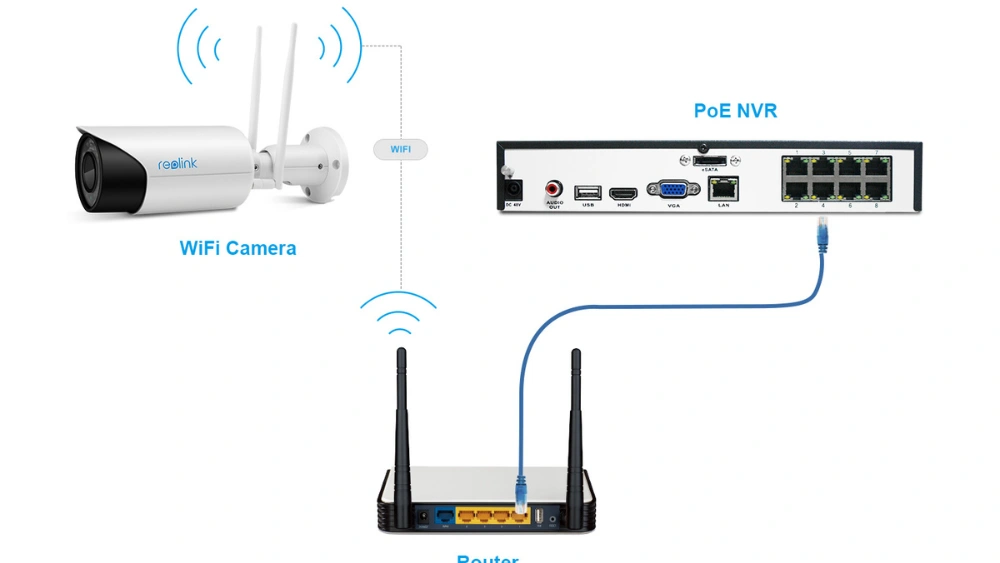
Connecting Swann Dvr To Wifi
Connecting your Swann DVR to a WiFi network lets you watch live video without cables. It keeps your space neat and gives you easy access to your security footage. The process involves setting up the network connection through the DVR’s menu. Follow these steps to link your DVR to your WiFi router smoothly.
Accessing Dvr Network Menu
Start by turning on your Swann DVR and TV monitor. Use the remote or mouse to open the main menu. Find the “Network” option in the settings. Click on it to open the network configuration screen. This is where you can manage all connection settings.
Scanning And Selecting Wifi Network
Inside the network menu, choose “Wireless” or “WiFi.” Select the option to scan for available networks. The DVR will display a list of nearby WiFi signals. Look for your router’s name (SSID) in the list. Highlight your network and select it to connect.
Entering Wifi Password
After selecting your network, you must enter the WiFi password. Use the on-screen keyboard or remote to type it carefully. Check for correct letters and numbers to avoid errors. Confirm the password and wait for the DVR to connect. Once connected, your DVR is online without any cables.

Credit: www.amazon.com.au
Troubleshooting Connection Issues
Connecting a Swann DVR to a WiFi router without a cable can sometimes lead to connection problems. These issues can cause your security system to lose its link to the network. Troubleshooting these problems quickly helps maintain continuous video monitoring. Understanding common wireless problems and knowing how to fix them is essential for smooth operation.
Common Wireless Problems
- Weak WiFi signal causing frequent disconnections.
- Incorrect WiFi password entered on the DVR.
- Router settings blocking the DVR from connecting.
- Interference from other electronic devices nearby.
- Outdated firmware on the Swann DVR or router.
Steps To Fix Connection Errors
- Move the DVR closer to the WiFi router for a stronger signal.
- Double-check and re-enter the WiFi password carefully.
- Restart both the DVR and the WiFi router to refresh connections.
- Update firmware on the DVR and router to the latest versions.
- Change the WiFi channel on the router to reduce interference.
- Disable MAC address filtering on the router if enabled.
- Reset network settings on the DVR and reconnect to WiFi.
Enhancing Wireless Performance
Improving your Swann DVR’s wireless connection means more than just linking it to your router. It’s about making sure that signal reaches the DVR strong and steady. A weak signal can cause lag, interruptions, or even a complete loss of connection, which defeats the purpose of having a wireless setup.
Optimal Router Placement
Where you place your router matters a lot. Walls, furniture, and even appliances can block or weaken WiFi signals. Try to position your router in a central spot, away from thick walls or metal objects.
Higher placement often helps too. I once moved my router from the floor to a shelf and saw an immediate boost in signal strength. Think about where your DVR is located and place the router so the signal path is as clear as possible.
Also, avoid placing your router near devices that emit electromagnetic interference, like microwaves or cordless phones. Have you checked your router’s current position lately? Sometimes a small change can make a big difference.
Using Wifi Extenders
If your DVR is far from the router, a WiFi extender can fill the gap. These devices pick up your router’s signal and boost it to reach areas that are normally weak or dead zones.
Choose an extender that supports the same WiFi standards as your router for the best speed and reliability. Setting one up usually just requires plugging it in halfway between your router and DVR.
One trick I found useful is testing the extender’s placement with a phone or laptop before finalizing. Moving it a few feet can improve the connection dramatically. Have you tried moving your extender around to find the sweet spot?
Credit: greensafaris.com
Frequently Asked Questions
How Do I Connect Swann Dvr To Wifi Without Cables?
To connect your Swann DVR to WiFi without cables, use the DVR’s built-in WiFi setup. Access the menu, select Network Settings, then Wireless Setup. Choose your WiFi network, enter the password, and connect. Ensure your router is within range for a stable connection.
Can Swann Dvr Work Wirelessly Without Ethernet Cable?
Yes, Swann DVRs with WiFi capability can connect wirelessly. Use the DVR’s wireless setup feature to link it to your WiFi network. This eliminates the need for an Ethernet cable, allowing flexible camera placement and easier installation.
What If Swann Dvr Wifi Connection Fails?
If your Swann DVR WiFi connection fails, first check the WiFi password and network name. Ensure the router is active and signal strength is strong. Restart both the DVR and router. Update DVR firmware if needed, and try reconnecting through the network settings menu.
Is Wifi Connection Secure For Swann Dvr?
WiFi connections for Swann DVRs are secure when using WPA2 or WPA3 encryption. Always set a strong, unique password for your WiFi network. Regularly update firmware to fix security issues and prevent unauthorized access to your surveillance system.
Conclusion
Connecting your Swann DVR to a WiFi router without a cable is simple. Follow the steps carefully and stay patient. Make sure your router is working and within range. Use the DVR menu to find the WiFi settings. Enter your network name and password correctly.
Check the connection status to confirm success. This method saves space and avoids messy wires. Enjoy easy access to your security system online. Keep your devices updated for better performance. Stay safe and monitor your property with ease.