

Are you tired of weak WiFi signals in some corners of your home? Setting up a WiFi extender can be the simple fix you need to enjoy strong, reliable internet everywhere.
But if you’re not sure where to start or feel overwhelmed by the technical steps, don’t worry—you’re in the right place. This guide will walk you through the setup process in easy, clear steps, so you can boost your WiFi quickly and without frustration.
Keep reading, and you’ll be surfing smoothly in no time.

Credit: www.youtube.com
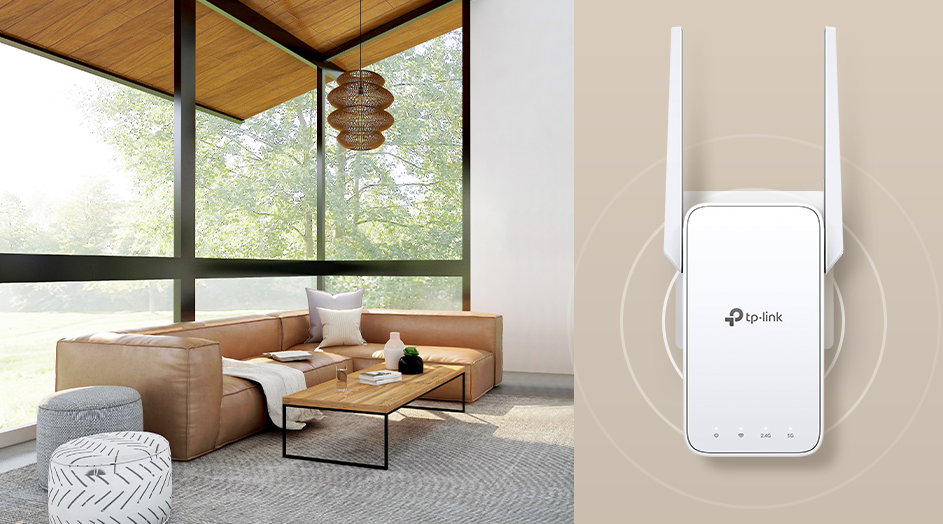
Choosing The Right Wifi Extender
Choosing the right WiFi extender is key to improving your home or office internet experience. The perfect device can boost your signal without frustration or wasted money. Understanding what fits your needs helps you avoid common setup headaches and enjoy seamless connectivity.
Types Of Wifi Extenders
WiFi extenders come in various forms, each suited for different situations. You can find plug-in extenders that connect directly to power outlets, desktop extenders that offer more ports, and mesh WiFi systems that create a unified network.
Think about your space size and layout. A mesh system works well for large or multi-floor homes, while a simple plug-in extender might suffice for smaller areas.
Compatibility With Routers
Not all extenders work with every router. Check if your extender supports your router’s WiFi standards like 802.11ac or 802.11ax. Also, verify if it supports dual-band or tri-band frequencies to match your router’s capabilities.
Using an incompatible extender can cause slow speeds or connection drops. Have you looked at your router’s manual or specifications before buying an extender?
Placement Tips
Where you place your extender matters more than you might think. Position it halfway between your router and the weak signal area for the best coverage. Avoid walls, metal objects, and appliances that can block or weaken the signal.
Try moving the extender around and testing the connection speed in different spots. Have you noticed how even a few feet can change your WiFi quality dramatically?
Credit: www.tp-link.com
Preparing For Installation
Preparing for installation is the first step to extend your WiFi network smoothly. This phase helps avoid common setup problems. It also ensures a stable and fast connection once the extender is active. Proper preparation saves time and reduces frustration.
Gathering Necessary Tools
Collect all tools before starting. You will need:
- The WiFi extender device
- A power outlet near your router
- A computer, smartphone, or tablet with WiFi
- Your router’s admin login details
- An Ethernet cable (optional for some models)
Having these ready speeds up the setup process.
Checking Network Details
Know your network’s name (SSID) and password. These are needed to connect the extender to your router.
Check if your router uses 2.4 GHz or 5 GHz bands. Some extenders support only one band. Confirm your extender’s compatibility.
Write down the network details to avoid mistakes during setup.
Resetting The Extender
Resetting the extender clears old settings. This ensures a fresh start for setup.
Find the reset button, usually a small hole. Use a pin or paperclip to press it for 10 seconds.
Release the button and wait for the extender to restart. This can take up to a minute.
After resetting, the extender will be ready for new configuration.
Connecting To Your Extender
Connecting your WiFi extender is a key step to boost your internet range. This process links the extender to your main router. Doing this correctly ensures better WiFi signal throughout your home or office.
Several methods exist to connect the extender. You can power it on, use the WPS button, or set it up manually through a web interface. Each method is simple and suits different user preferences.
Powering On The Device
Plug your WiFi extender into a power outlet near your router. Wait for the power light to turn solid. This light shows the device is ready to connect. Avoid moving the extender during setup to prevent connection issues.
Using Wps Button
Press the WPS button on your router first. Within two minutes, press the WPS button on the extender. The extender’s WPS light will blink, then stay solid when connected. This method creates an instant secure link without entering passwords.
Manual Setup Via Web Interface
Connect your phone or computer to the extender’s WiFi network. Open a browser and enter the extender’s IP address or URL. Log in with the default username and password. Follow the on-screen setup wizard to select your main WiFi network. Enter your WiFi password to complete the connection.
Configuring Settings
Configuring your WiFi extender settings is key for a strong and stable connection. This process involves linking the extender to your main network and setting up security to keep your data safe. Follow clear steps to make sure your extender works well with your home WiFi.
Selecting The Main Network
Start by choosing your main WiFi network. This is the network your extender will boost. Look for the network name (SSID) on the list shown by your extender’s setup page. Select the correct network to avoid connection issues. Double-check the signal strength to ensure a good link.
Setting Ssid And Password
Your extender needs a name and password for the extended network. You can keep the same SSID and password as your main network or create new ones. Using the same name helps devices switch smoothly between networks. If you choose a new name, pick something easy to remember. Set a strong password with letters and numbers for security.
Adjusting Security Options
Security settings protect your WiFi from unauthorized access. Most extenders support WPA2, which is safe and reliable. Avoid using open or WEP security, as they are weak. Enable the highest encryption available in the extender’s settings. This keeps your connection safe from intruders and hackers.
Optimizing Extender Placement
Optimizing the placement of your WiFi extender is key to improving your home network. The right spot boosts coverage and reduces dead zones. A poorly placed extender can weaken the signal or cause slow speeds.
Focus on finding the best location that balances strong signals and minimal interference. Testing and adjusting the position will help get the most from your device.
Finding The Signal Sweet Spot
Place the extender halfway between your router and the area with weak WiFi. It should catch a strong signal from the router. Avoid walls or large objects blocking the path.
Look for open spaces where the signal can travel easily. High shelves or corners near the router often work well. Keep the extender visible and not tucked away.
Avoiding Interference
Keep the extender away from devices that cause signal noise. Microwaves, cordless phones, and baby monitors can disrupt WiFi. Metal objects and thick walls also block signals.
Choose a spot free from electrical clutter. Avoid placing the extender near fish tanks or large mirrors. These can reflect and weaken signals.
Testing Signal Strength
Use your phone or laptop to check WiFi speed near the extender. Move around the room to see where the signal is strongest. Many routers have apps that show signal strength.
Adjust the extender’s position based on these tests. Small moves can make a big difference. Aim for steady, strong connection without drops.

Credit: www.youtube.com
Troubleshooting Common Issues
Setting up a WiFi extender can sometimes lead to common problems. These issues may interrupt your internet connection or slow down your speed. Troubleshooting helps fix these problems quickly. Below are common issues and ways to solve them.
Connection Drops
Connection drops happen when the extender loses signal from the router. This breaks your internet connection. Try moving the extender closer to the router but not too close. Avoid walls and large objects between devices. Check if the extender is powered on and stable. Restart the extender and router to refresh the connection. Use a WiFi analyzer app to find the best spot.
Slow Speeds
Slow speeds reduce your internet quality. Many devices using the network at once can cause this. Change the extender’s channel to avoid interference from neighbors. Place the extender in a central area for better coverage. Limit the number of connected devices. Clear the cache on your devices to improve speed. Test your speed regularly to check improvements.
Firmware Updates
Firmware updates improve extender performance and security. Check the manufacturer’s website for the latest version. Download and install updates following the instructions. Updates can fix bugs and add new features. Set reminders to check for updates regularly. Do not turn off the extender during the update process.
Maintaining Your Wifi Extender
Maintaining your WiFi extender ensures it works well and lasts longer. Small tasks keep your network strong and devices connected. Regular care prevents slow speeds and connection drops. Simple steps help you avoid common problems and enjoy smooth internet access.
Regular Reboots
Reboot your WiFi extender often. This clears temporary bugs and refreshes connections. A quick restart can fix slow speeds or disconnections. Set a weekly schedule to reboot your device. Unplug it for 10 seconds, then plug it back in. This simple step improves performance without effort.
Monitoring Performance
Check your extender’s signal strength regularly. Use apps or built-in tools to test speed and coverage. Notice weak spots or slow speeds. Move your extender to a better spot if needed. Keep an eye on connected devices. Disconnect old or unused devices to free up bandwidth. Monitoring helps maintain a fast and steady connection.
Security Best Practices
Change your extender’s default password right away. Use a strong, unique password with letters, numbers, and symbols. Keep your extender’s firmware updated to fix security issues. Disable WPS (WiFi Protected Setup) to avoid hacking risks. Use WPA3 or WPA2 encryption for safety. Secure settings protect your network and personal data.
Frequently Asked Questions
How Do I Connect My Wifi Extender To The Router?
To connect, plug in your extender near the router. Press the WPS button on both devices. Wait for the extender’s light to stabilize, indicating a successful connection.
Where Should I Place My Wifi Extender For Best Coverage?
Place the extender halfway between your router and weak signal areas. Avoid walls or large metal objects. This placement ensures optimal signal boost and wider WiFi coverage.
How Do I Configure My Wifi Extender Settings?
Access the extender’s setup page via a web browser. Enter the default IP address, login credentials, and follow the setup wizard. Customize network name and password as needed.
Why Is My Wifi Extender Not Connecting To The Internet?
Check the extender’s connection to your router first. Ensure correct WiFi password and network settings. Restart both devices if needed, and place the extender closer to the router.
Conclusion
Setting up your WiFi extender can improve your home internet easily. Place the extender where your main WiFi signal is still strong. Follow the steps carefully for a smooth setup. Restart your devices if the connection feels slow. Test the connection in different rooms to find the best spot.
A good WiFi extender helps reduce dead zones in your house. Keep your extender’s firmware updated for better performance. Enjoy more reliable internet without extra cost or hassle. Simple steps lead to stronger WiFi throughout your home.