
Have you ever grabbed your favorite ceramic mug, only to notice a crack running through it? It’s frustrating to think you might have to throw it away.
But before you toss it out, what if you could fix it yourself? Imagine saving your mug and enjoying your coffee just like before. You’ll discover simple, effective ways to repair a cracked ceramic mug. Keep reading, and you’ll learn how to bring your mug back to life quickly and safely.

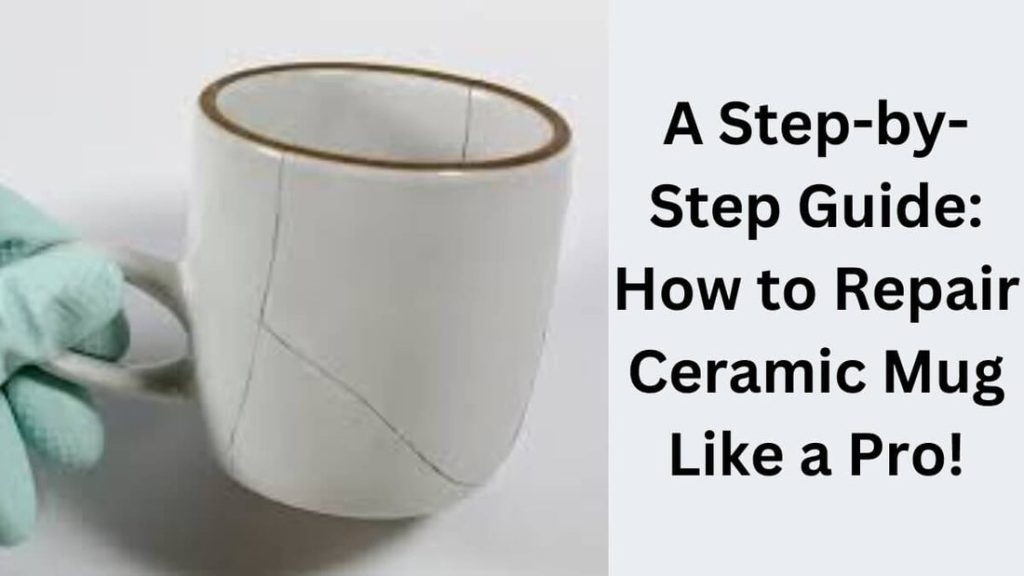
Credit: issoantea.com
Tools And Materials Needed
Fixing a cracked ceramic mug needs the right tools and materials. Using proper items helps the repair last longer and look better. Gather everything before starting to save time and avoid mistakes.
Epoxy Adhesive
Choose a clear, two-part epoxy glue. It bonds ceramic pieces strongly. Make sure it is safe for items that contact food and drink.
Sandpaper
Use fine-grit sandpaper to smooth rough edges. It helps the glue stick better and creates a neat finish.
Clamps Or Rubber Bands
These keep the mug pieces together while the glue dries. Choose small clamps or rubber bands that fit the mug size.
Cleaning Supplies
Use rubbing alcohol and a soft cloth to clean the mug. Removing dirt and oils helps the glue hold well.
Mixing Tools
Have a small disposable container and a toothpick or stir stick ready. Use them to mix and apply the epoxy precisely.
Protective Gloves
Wear gloves to protect your skin from epoxy. It can be sticky and irritating.
Assessing The Damage
Before fixing a cracked ceramic mug, check the damage carefully. Knowing the crack’s size and depth helps decide if repair is possible.
Small cracks might be easy to fix. Deep or wide cracks need more attention or may be unsafe to use.
Identifying The Type Of Crack
Look at the crack closely. Is it a hairline crack or a large break? Hairline cracks are thin and shallow. Large cracks might split the mug into pieces.
Check if the crack goes through the entire mug or only the surface. Surface cracks are less serious.
Checking For Chips And Missing Pieces
Find any chips near the crack. Missing pieces can make repair harder. Chips on the rim can cause cuts when drinking.
Note the shape of missing parts. Irregular edges may need special glue or filler.
Testing For Leaks
Fill the mug with water. Watch if water leaks from the crack. Leaks mean the crack is deep and affects use.
Leaks also show if the mug is safe for hot drinks. Avoid using damaged mugs for hot liquids.
Assessing Structural Stability
Hold the mug gently. Press near the crack to see if it moves or feels weak. Unstable cracks can cause the mug to break suddenly.
If the mug feels fragile, consider replacing it to avoid accidents.
Preparing The Mug For Repair
Preparing the mug for repair is a crucial step to ensure the fix holds well. The surface must be clean and dry to allow strong bonding. Any dirt, grease, or leftover residue can weaken the glue or adhesive.
Taking time to prepare the mug carefully increases the chance of a successful repair. This section explains how to get the mug ready before applying any repair materials.
Cleaning The Surface
Use warm water and mild soap to wash the mug thoroughly. Focus on the cracked area and its surroundings. Avoid harsh chemicals that might damage the ceramic.
Rinse the mug well to remove all soap traces. Use a soft cloth or sponge to avoid scratching the surface.
Drying The Mug
Dry the mug completely with a clean towel. Moisture can prevent adhesives from sticking properly. Let the mug air dry for 30 minutes to ensure no dampness remains.
Removing Loose Fragments
Inspect the crack for any loose ceramic pieces. Gently remove these fragments using tweezers. Loose parts can interfere with the repair and cause weak spots.
Sanding The Cracked Area
Lightly sand the edges of the crack with fine-grit sandpaper. This step roughens the surface to help glue adhere better. Clean off dust with a dry cloth after sanding.
Gathering Repair Materials
Prepare all needed tools and adhesives before starting. Common items include:
- Epoxy or ceramic glue
- Small brush or toothpick for application
- Clamps or rubber bands to hold pieces
- Protective gloves
Having everything ready saves time and avoids interruptions during repair.

Credit: www.youtube.com
Using Epoxy Glue For Cracks
Using epoxy glue to fix cracks in your ceramic mug can be a game-changer. It offers a strong, durable bond that restores both function and appearance. But choosing the right epoxy and applying it properly is key to making your repair last.
Choosing The Right Epoxy
Not all epoxies are created equal. Look for a two-part epoxy specifically labeled as safe for ceramics and food contact if you plan to drink from the mug. Some epoxies dry clear, which helps keep the mug looking neat.
Consider the curing time too. Quick-setting epoxies let you finish the repair faster, but slower cures often create a stronger bond. Have you checked the epoxy’s resistance to heat and water? Your mug will face both in daily use, so pick one designed to handle these conditions.
Applying Epoxy Correctly
Preparation makes all the difference. Clean the cracked area thoroughly, removing any dirt or grease. Slightly roughen the surface with fine sandpaper to help the epoxy stick better.
Mix the two epoxy components exactly as instructed. Apply a thin layer directly into the crack using a toothpick or small brush for precision. Press the cracked pieces together firmly and hold them in place until the epoxy begins to set.
Remove any excess epoxy immediately with a damp cloth to avoid unsightly residue. Then, let the mug cure fully in a safe, dry spot. Have you ever noticed how a careful application can turn a cracked mug almost as good as new? That’s the power of epoxy done right.
Alternative Repair Methods
Using clear epoxy glue can seal cracks and restore your ceramic mug’s strength. Another way involves mixing baking soda with super glue to fill gaps smoothly. Gentle sanding after drying helps create a neat, almost invisible repair.
Alternative Repair Methods Cracked ceramic mugs can often be repaired with simple techniques. These methods not only restore function but retain sentimental value.Using Super Glue
Super glue provides a quick fix for cracked mugs. Ensure the mug is clean and dry. Apply a thin layer of glue on the crack. Press the pieces together firmly. Hold for a few minutes until set. Check for gaps and apply more glue if needed. Let it dry completely before use.Using Food-safe Sealants
Food-safe sealants are great for mug repairs. They ensure safety while drinking. Choose a sealant labeled as food-safe. Apply it on the crack carefully. Smooth it out with a brush or tool. Allow it to cure as per instructions. Ensure the sealant bonds well to avoid leaks.Drying And Curing Time
Allow the adhesive to dry fully for at least 24 hours to ensure a strong bond. Curing time may vary depending on glue type and room temperature. Patience during this process prevents the crack from reopening.
Drying and curing time is a crucial part of fixing a cracked ceramic mug. Once you have applied the adhesive, it’s essential to allow adequate drying time. This ensures that the bond is strong and durable. Rushing this step can lead to weak repairs and further cracking.Understanding The Importance Of Drying Time
Proper drying time is vital for a successful repair. It allows the adhesive to set firmly. This prevents future damage to the ceramic mug. The recommended drying period varies by adhesive type. Generally, most adhesives need 24 hours to dry completely. Some might require longer, depending on their formulation.Choosing The Right Environment For Drying
A stable environment helps in effective drying. Place the mug in a dry area with moderate temperature. Avoid humid or cold locations. These conditions can affect the drying process. Ensure the area is dust-free. Dust can interfere with the adhesive bond.Ensuring Adequate Curing Time
Curing time is distinct from drying time. It allows the adhesive to reach full strength. Curing might take additional days. Check the adhesive instructions for specific curing durations. Typically, curing takes 48 to 72 hours. Avoid using the mug during this period. This ensures the repair lasts longer.Testing The Repair After Curing
After the curing time, test the mug gently. Check for any loose parts or gaps. Hold the mug and inspect the repair closely. Ensure there are no visible cracks. If everything looks good, your mug is ready for use. If issues persist, consider reapplying adhesive.Finishing Touches
After repairing the crack, the mug needs some finishing touches. These steps make the mug look smooth and neat. They also help protect the repaired area. Taking time on these details improves the mug’s appearance and durability.
Sanding Rough Edges
Use fine-grit sandpaper to smooth the repaired crack. Gently sand around the fixed area to remove bumps or sharp edges. Be careful not to sand too hard to avoid damage. Wipe away dust with a damp cloth after sanding. This step ensures the mug feels smooth to touch.
Touching Up With Paint
Match the mug’s original color with ceramic paint. Use a small brush to carefully cover the repaired spot. Apply thin layers and let each dry before adding more. This hides the repair and blends it with the rest of the mug. Finish with a clear sealant for extra protection and shine.
Safety Tips For Using Repaired Mugs
Using a ceramic mug after repairing it can feel like giving new life to a favorite item. However, safety should always come first. Even a well-fixed mug can have weak points that you need to watch out for.
Check For Food-safe Adhesives
Not all glues are safe for items that hold hot drinks. You must use food-safe, non-toxic adhesives when repairing your mug. Avoid any glue that doesn’t clearly state it’s safe for kitchenware.
Have you ever used a repaired mug and noticed a strange smell or taste? That’s a sign the adhesive isn’t safe for drinking vessels.
Inspect The Mug Before Each Use
Regularly check your repaired mug for new cracks or signs of the old repair failing. Even a small crack can worsen with heat or pressure.
Take a moment to run your fingers along the repaired area. Does it feel rough, loose, or uneven? If yes, it’s time to stop using the mug.
Avoid Extreme Temperatures
Heat can stress repaired ceramics more than usual. Avoid putting your mug in the microwave or dishwasher, as these can weaken the glue or cause cracks to reopen.
Instead, hand wash with warm water and mild soap. Your mug will last longer, and you’ll reduce the risk of damage.
Use Repaired Mugs For Cold Or Warm Drinks Only
If you want to keep your mug safe, use it for drinks that aren’t too hot. Cold or lukewarm beverages put less stress on the repair.
Would you risk a painful spill from a hot drink in a fragile mug? Keeping it for cold drinks avoids that risk.
Limit Daily Use And Handle With Care
A repaired mug isn’t as strong as a new one. Don’t rely on it for your everyday coffee or tea if you want it to last.
Handle it gently and avoid stacking or dropping. Treating your mug with care extends its life and keeps you safe.
Preventing Future Cracks
Preventing future cracks in your ceramic mugs helps extend their life. Small habits make a big difference. Taking care of mugs properly avoids stress and damage.
Handle With Care
Always hold mugs gently. Avoid gripping too tightly or dropping. Place mugs down softly on flat surfaces. Rough handling causes cracks over time.
Avoid Sudden Temperature Changes
Do not pour boiling water into cold mugs. Warm mugs slowly before adding hot liquids. Avoid placing hot mugs in cold sinks. Sudden temperature changes cause ceramic to crack.
Use Suitable Cleaning Methods
Wash mugs with mild soap and soft sponges. Avoid abrasive cleaners and steel wool. Hand washing is better than dishwashers. Harsh cleaning damages the surface and weakens the mug.
Store Mugs Properly
Keep mugs in a stable, secure spot. Avoid stacking mugs directly on top of each other. Use shelf liners or separators to prevent rubbing. Proper storage stops chips and cracks.
Check For Early Signs Of Damage
Inspect mugs regularly for small cracks or chips. Early detection helps prevent bigger damage. Stop using mugs that show signs of weakness. Replace or repair them promptly.

Credit: www.patreon.com
Frequently Asked Questions
How Can I Repair A Cracked Ceramic Mug At Home?
You can repair a cracked ceramic mug using food-safe epoxy or super glue. Clean the crack, apply glue carefully, and let it dry completely. This method restores the mug’s usability for non-hot liquids and prevents further damage.
Is It Safe To Drink From A Repaired Ceramic Mug?
If you use a food-safe adhesive and the crack is sealed properly, the mug can be safe. However, avoid hot liquids as heat may weaken the repair. Always check for leaks before use to ensure safety.
What Materials Do I Need To Fix A Cracked Ceramic Mug?
You need food-safe epoxy or super glue, a fine brush or toothpick, rubbing alcohol for cleaning, and a soft cloth. These materials help you bond the crack securely and prepare the surface for a clean repair.
Can A Cracked Ceramic Mug Be Restored To Hold Hot Liquids?
Usually, repaired ceramic mugs are not recommended for hot liquids. Heat can cause the adhesive to break down, leading to leaks or cracks reopening. Use repaired mugs for cold or room temperature beverages only.
Conclusion
Fixing a cracked ceramic mug can save money and reduce waste. Small cracks need quick care to avoid leaks. Use simple tools and safe glue for the best results. Let the mug dry fully before using it again. This way, you keep your favorite mug longer.
A little patience brings big rewards. Try these steps and enjoy your repaired mug every day.