
Have you ever reached for your favorite ceramic mug, only to find the handle broken or loose? It’s frustrating, and you might think the mug is beyond repair.
But what if you could fix it yourself, saving money and keeping your beloved cup? In this guide, you’ll discover simple, effective steps to restore your ceramic mug handle. Whether it’s a clean break or a shaky joint, you’ll learn how to make it strong and safe again.
Keep reading, and you’ll be holding your favorite mug comfortably in no time.

Credit: www.patreon.com
Identify The Damage
Identifying the damage is the first key step to fix a ceramic mug handle. This process helps understand the problem clearly. It guides the right repair method. Careful inspection prevents further damage and ensures safety while using the mug again.
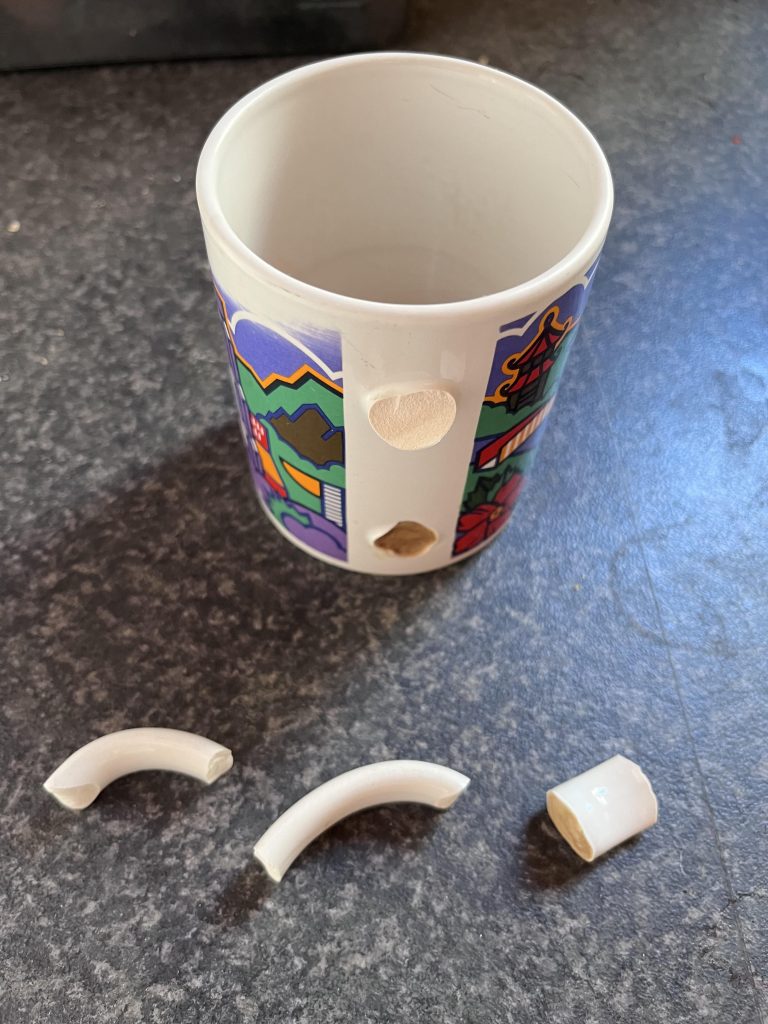
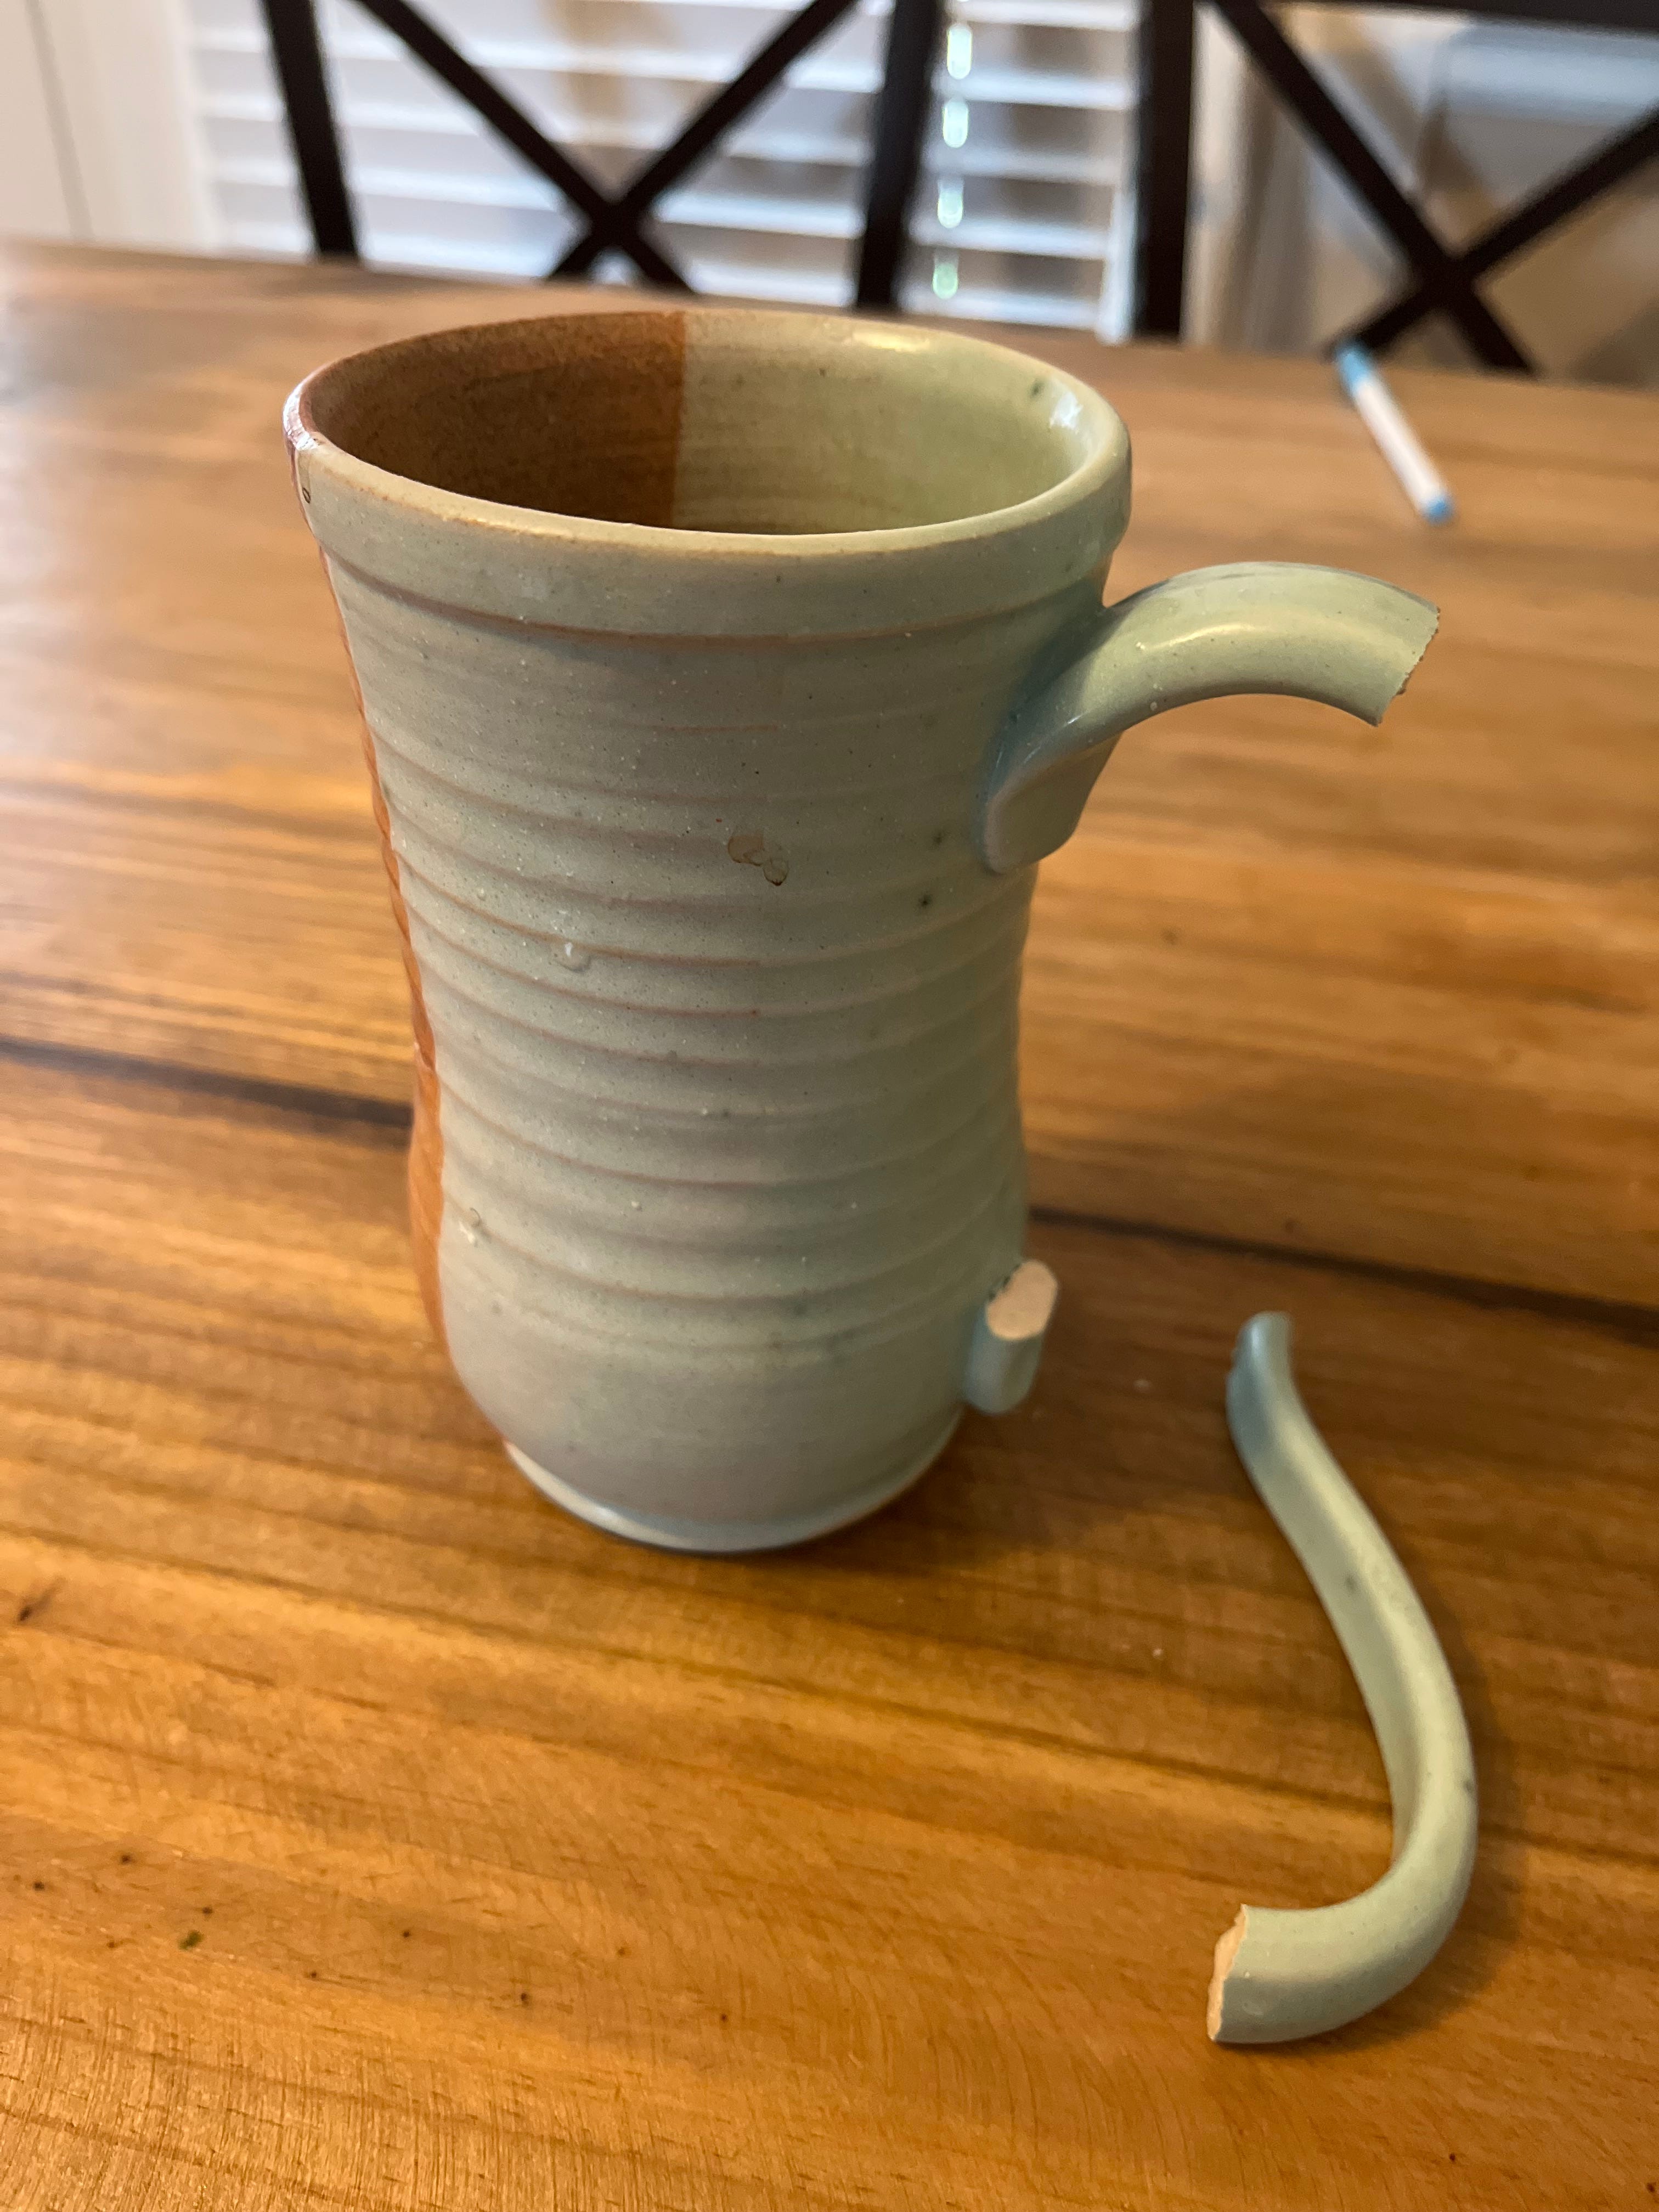
Check For Cracks Or Breaks
Look closely at the handle for any cracks. Small hairline cracks can grow bigger if ignored. Check for clean breaks where the handle might have snapped off. Notice any chips or missing pieces. Use good lighting to see all details. Gently tap the handle to hear if it sounds solid or hollow. A hollow sound might mean hidden damage inside the ceramic.
Assess The Handle Attachment
Examine how the handle connects to the mug body. Check if the glued or fused area shows signs of weakness. Look for gaps or looseness between the handle and mug. Wiggle the handle slightly to test stability. If it moves or feels loose, it needs stronger repair. Also, inspect the inside and outside of the attachment points for hidden cracks or damage.
Gather Repair Materials
Gathering the right materials is key to fixing a ceramic mug handle properly. Having everything ready saves time and helps the repair last longer. A few simple tools and supplies are all you need for a strong bond.
Prepare your workspace with good lighting and a clean surface. This will keep your repair neat and easier to manage. Focus on getting quality materials for the best results.
Choose The Right Adhesive
Selecting the correct glue is crucial for a durable fix. Use an adhesive designed for ceramics or porcelain. Epoxy glue works well because it forms a strong, lasting bond.
Look for waterproof and heat-resistant glue. This type ensures your mug handle stays secure even with hot drinks. Avoid superglue that is not made for ceramics, as it may break easily.
Prepare Cleaning Supplies
Clean surfaces ensure the adhesive sticks firmly. Gather rubbing alcohol, a soft cloth, and warm water. Use these to remove dirt, grease, and dust from the broken edges.
Dry the mug parts completely before gluing. Moisture can weaken the bond. Keep cleaning supplies handy for quick touch-ups during repair.
Prepare The Mug For Repair
Before fixing a ceramic mug handle, proper preparation is key. Preparing the mug ensures a strong, lasting repair. This step involves cleaning and drying the broken surfaces carefully. Proper preparation helps the adhesive stick better. It also prevents dirt or moisture from weakening the bond.
Clean The Broken Surfaces
Begin by removing dust, dirt, and old glue from the broken edges. Use a soft cloth or cotton swab with rubbing alcohol. Gently wipe the broken parts to eliminate oils and grime. Avoid using water alone, as it may leave residue. Clean surfaces help the glue bond tightly and prevent gaps.
Dry Thoroughly
After cleaning, make sure the mug is completely dry. Use a dry cloth to wipe off any moisture. Let the mug air dry for a few minutes if needed. Moisture can weaken the glue and cause the repair to fail. Dry surfaces ensure a strong and durable fix for the handle.

Credit: www.instagram.com
Apply Adhesive Correctly
Applying adhesive correctly is key to fixing a ceramic mug handle. It ensures a strong bond and prevents future breaks. Careful application helps the handle stay in place while drying. Follow these simple tips for the best results.
Use Proper Amount
Use just enough adhesive to cover the broken surfaces. Too much glue creates a mess and weakens the bond. Too little glue may not hold the handle properly. Apply a thin, even layer to both the mug and handle. Avoid excess glue that can squeeze out when pressed together.
Align Handle And Mug
Position the handle carefully before the glue starts to set. Align the broken edges perfectly to ensure a tight fit. Press the handle firmly but gently against the mug. Hold it steady for a few seconds to avoid slipping. Check the alignment from different angles to confirm it looks natural.
Secure The Handle
Securing the handle properly is crucial to ensure your ceramic mug is safe to use again. The right hold keeps the handle in perfect position while the adhesive sets, preventing any wobbling or misalignment. Patience here will save you from a frustrating repeat repair later.
Clamp Or Hold In Place
Use a clamp or simply hold the handle firmly against the mug to keep it steady. If you don’t have a clamp, try using rubber bands or tape to maintain pressure. Make sure the handle lines up exactly where it broke off—any shift can weaken the bond.
I once used a small C-clamp for a mug repair, and it made a huge difference. The handle stayed perfectly still, and the glue dried evenly. Without it, the handle might have twisted or slipped, ruining the fix.
Allow Adhesive To Cure
After securing the handle, give the adhesive enough time to fully cure. This can take anywhere from a few hours to 24 hours depending on the glue type. Avoid the temptation to test the mug too soon—it needs to reach full strength before you use it again.
Think about how you handle fragile items: rushing the process can cause more damage. Check the glue packaging for recommended curing times and stick to them strictly. Your patience here ensures a long-lasting repair.
Credit: drfabulous.medium.com
Finishing Touches
After securing the ceramic mug handle, the final details make a big difference. Proper finishing ensures the repair looks clean and holds strong. These steps help your mug look almost new again and ready for use.
Remove Excess Glue
Check the glued area carefully for any leftover glue. Use a damp cloth or cotton swab to gently wipe off extra glue. Be careful not to disturb the bond. For dried glue, lightly scrape with a plastic tool to avoid damage. Clean edges make the handle look neat and tidy.
Test The Repair Strength
Hold the mug by the handle and gently move it side to side. Apply light pressure to see if it feels secure. Avoid heavy pulling or twisting at first. Let the glue cure fully before using the mug for hot drinks. A strong handle means your repair worked well and the mug is safe to use again.
Prevent Future Damage
Ceramic mugs are a staple in many households. They offer durability and style, but their handles can be fragile. Once you’ve fixed a broken handle, it’s wise to prevent future damage. Simple care can ensure your mug lasts longer.
Handle With Care
Always hold the mug by its body, not just the handle. This distributes the weight evenly, reducing strain on the handle. If the mug is heavy, use both hands for support. Avoid stacking mugs with handles touching. This prevents accidental pressure that can cause breaks.
Avoid Extreme Temperatures
Ceramic mugs can crack under sudden temperature changes. Let the mug adjust gradually when heating or cooling. Never pour boiling water directly into a cold mug. Instead, warm the mug first with lukewarm water. Avoid placing hot mugs directly in cold environments like a fridge.
Frequently Asked Questions
How Do I Repair A Broken Ceramic Mug Handle?
Use strong adhesive like epoxy glue for a clean bond. Clean surfaces, apply glue, hold firmly, and let dry 24 hours.
What Glue Works Best For Fixing Ceramic Handles?
Epoxy glue is ideal. It provides a durable and waterproof bond for ceramic repairs. Avoid superglue for stronger hold.
Can I Use A Ceramic Mug After Fixing Its Handle?
Yes, once the glue fully cures, the mug is safe to use. Avoid microwaving if glue isn’t heat-resistant.
How Long Does It Take For Ceramic Glue To Dry?
Epoxy glue typically dries in 24 hours. Full strength develops after this time for a sturdy repair.
Conclusion
Fixing a ceramic mug handle is simple with the right steps. Use strong glue and clean the surfaces well. Hold the pieces firmly until dry. Avoid using the mug immediately after repair. Small cracks or breaks do not mean you must throw it away.
A little care can make your mug useful again. Try these tips to save your favorite cup easily. Keep your mug safe and enjoy your drinks without worry. Repairing saves money and helps the environment too. Give your ceramic mug a second chance.