

Are you ready to make a roast that’s tender, juicy, and full of flavor? Cooking a roast in a Dutch oven is one of the best ways to achieve just that.
This method locks in moisture and lets the meat cook evenly, giving you a delicious meal with minimal effort. Whether you’re a beginner or just looking to improve your cooking skills, this guide will show you simple steps to master the perfect Dutch oven roast.
Keep reading, and soon you’ll be serving a mouthwatering roast that everyone will love.
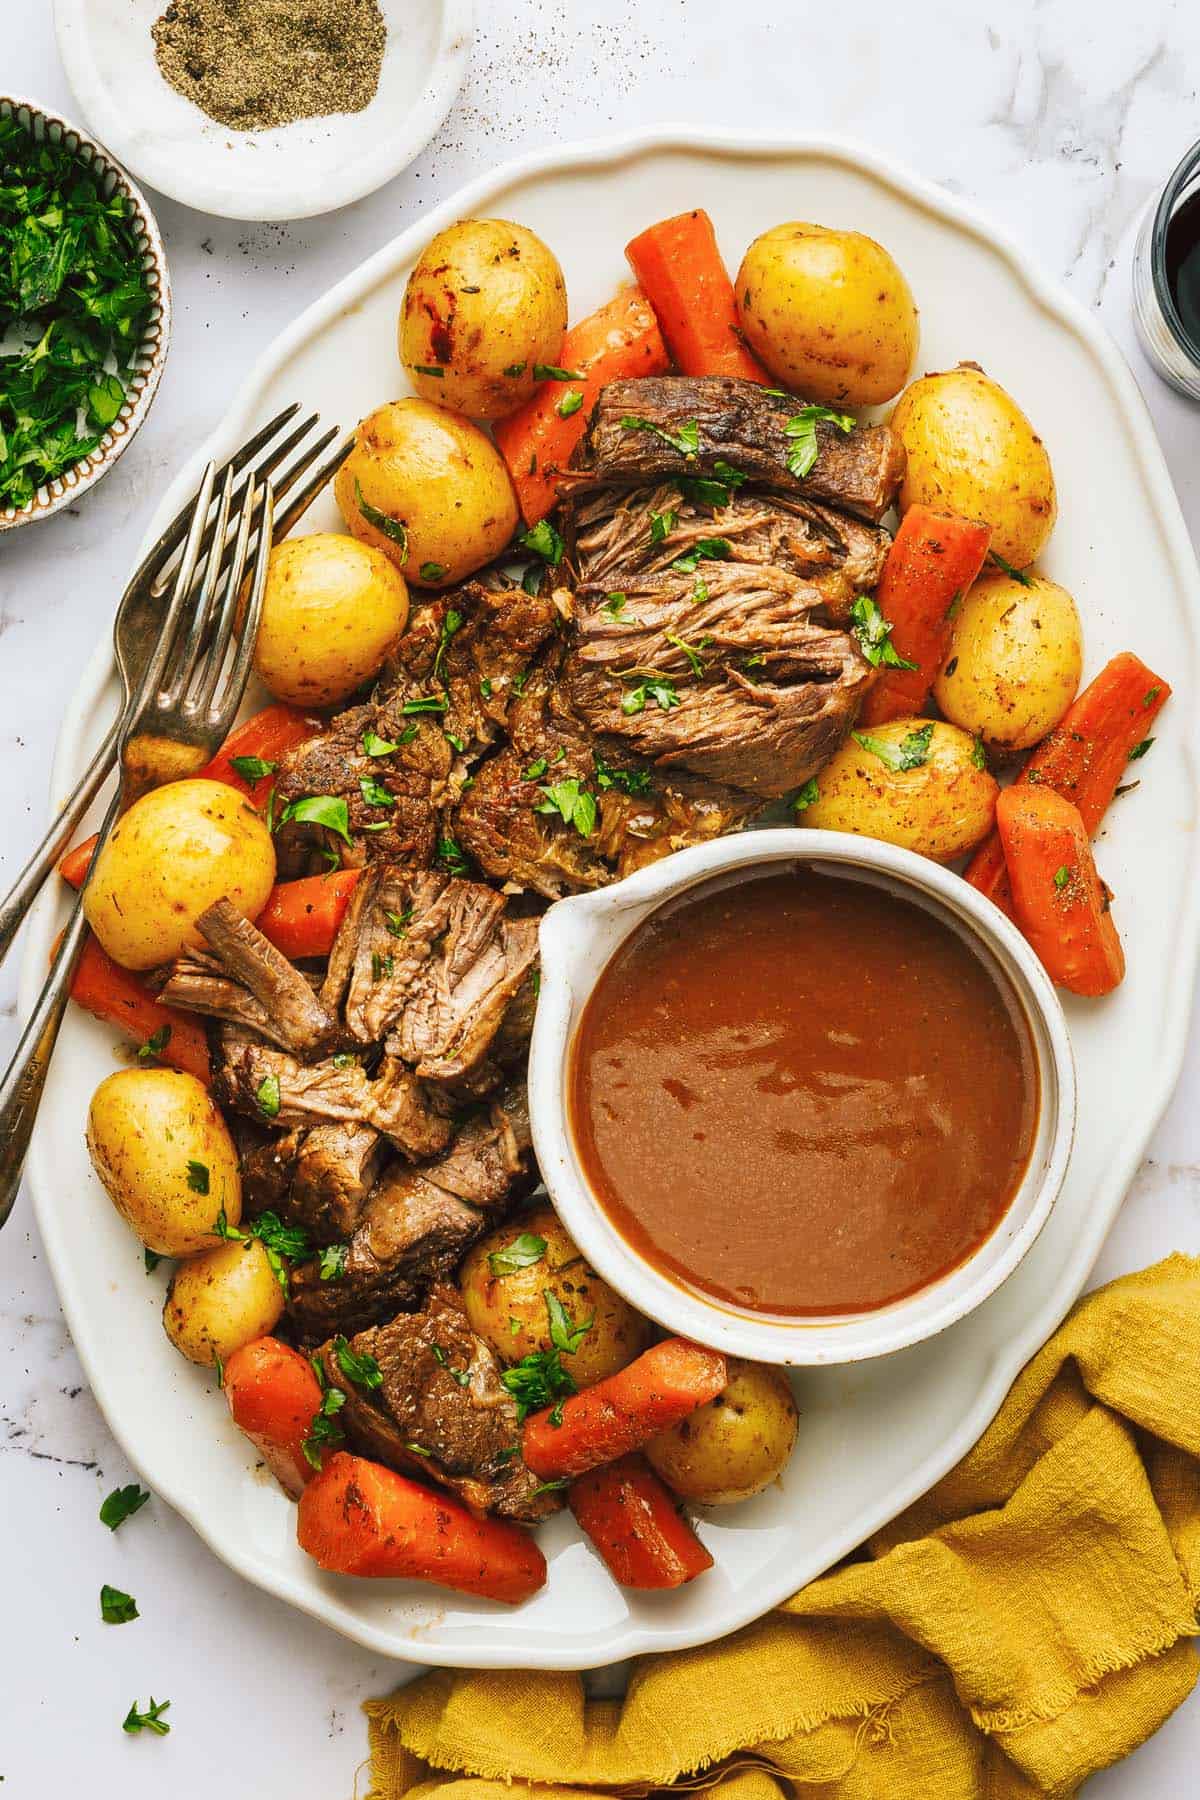
Credit: midwestfoodieblog.com
Choosing The Right Cut
Choosing the right cut of meat is the foundation of a successful roast in your Dutch oven. It affects everything from cooking time to flavor and tenderness. Picking the perfect cut ensures your roast will come out juicy and flavorful every time.
Best Meats For Dutch Oven Roasts
Some cuts perform better in a Dutch oven than others because they handle slow, moist heat well. Look for tougher, more affordable cuts that become tender with long cooking.
- Chuck Roast:Rich in connective tissue, it breaks down beautifully, creating a tender, flavorful roast.
- Brisket:Ideal for slow cooking, brisket has a robust flavor and melts in your mouth when done right.
- Round Roast:Leaner but still great for slow roasting if cooked carefully to avoid drying out.
- Pork Shoulder:Perfect for pulled pork, it’s fatty and tenderizes well over time.
Have you tried any of these cuts in your Dutch oven before? Notice how the texture changes with slow cooking?
Considerations For Fat Content
Fat is your friend when cooking a roast in a Dutch oven. It adds moisture and flavor, and it helps keep the meat tender during long cooking times.
Look for cuts with a good balance of fat and lean meat. Too little fat can result in a dry roast, while too much can make it greasy.
- Marbled cuts hold up better to slow cooking and add richness.
- Fat layers on the outside help baste the meat as it cooks.
- Trimming excessive fat is smart but don’t remove it all.
Next time you pick a roast, think about how much fat you want left on the meat. How does that impact your cooking method or seasoning?
Preparing The Roast
Getting your roast ready is a crucial part of cooking in a Dutch oven. How you prepare it affects both flavor and texture. Taking time to properly trim and season, or even marinate, sets the stage for a delicious meal that melts in your mouth.
Trimming And Seasoning
Start by trimming excess fat from the roast. Leaving too much fat can cause flare-ups and uneven cooking, but a little fat adds flavor and moisture. Aim to leave a thin layer to keep the meat juicy.
Next, season generously. Salt and pepper are the basics, but you can add garlic powder, rosemary, or paprika for extra depth. Press the seasoning into the meat so it sticks well during cooking.
Have you noticed how a well-seasoned roast smells even before it hits the oven? That aroma is a good sign your roast will be flavorful inside.
Marinating Options
Marinating adds another layer of flavor and can tenderize tougher cuts. Use a mix of acid (like vinegar or citrus juice), oil, and herbs. For example:
- Red wine, olive oil, garlic, and thyme
- Soy sauce, ginger, garlic, and brown sugar
- Balsamic vinegar, honey, rosemary, and mustard
Keep your roast in the marinade for at least 2 hours, or overnight if you want deeper flavor. Remember to pat the meat dry before cooking to get a nice crust.
Have you ever skipped marinating and missed that extra tenderness? Trying it once can change how you view your roast forever.
Selecting The Dutch Oven
Selecting the right Dutch oven is key to cooking a perfect roast. This pot should hold heat well and distribute it evenly. Choose one that fits your needs for size and material. The lid’s fit also matters for keeping moisture inside. Understanding these details helps create tender, flavorful roasts every time.
Material And Size
Dutch ovens come in various materials like cast iron, enameled cast iron, and ceramic. Cast iron holds heat longer, ideal for slow roasting. Enameled versions need less seasoning and are easier to clean. Ceramic pots offer gentle heat but may not be as durable.
Size depends on the roast you plan to cook. A 5 to 7-quart Dutch oven suits most roasts for families. Choose a larger size for bigger cuts or batch cooking. A smaller pot may crowd the meat, causing uneven cooking.
Lid And Heat Distribution
A tight-fitting lid traps steam and moisture, keeping the roast juicy. Look for lids with a good seal and a sturdy handle. Some lids have a slight dome shape to catch condensation and drip it back on the roast.
Even heat distribution prevents hot spots that burn food. Thick, heavy bottoms spread heat smoothly. Avoid thin pots that heat unevenly, which can cause sticking or burning. A well-made Dutch oven ensures your roast cooks perfectly every time.
Credit: www.figjar.com
Browning The Meat
Browning the meat is a key step in cooking a roast in a Dutch oven. It creates a rich, deep flavor and forms a crust that locks in juices. Skipping this step can leave your roast tasting flat and less tender.
Searing Techniques
Start by patting your meat dry with paper towels. Moisture is the enemy of a good sear because it creates steam instead of a crust.
Heat your Dutch oven over medium-high heat and add a small amount of oil with a high smoke point, like canola or vegetable oil. When the oil shimmers, place the meat gently in the pot without crowding it.
Let the meat sit undisturbed for 3 to 5 minutes. Resist the urge to move it around; this helps develop that beautiful brown crust. Then, turn the roast to sear all sides evenly.
Temperature Tips
Maintaining the right temperature is crucial. Too low, and you won’t get a good crust; too high, and the oil will burn, giving a bitter taste.
Keep your heat at medium-high and watch the oil carefully. If it starts to smoke excessively, reduce the heat slightly. The ideal temperature for searing is around 400°F (204°C).
Use a thermometer if you have one, or trust your senses—look for a steady sizzle and a golden-brown crust forming in minutes. Have you ever waited too long and ended up steaming the meat instead? Adjusting the heat promptly saves the flavor and texture.
Adding Vegetables And Aromatics
Adding vegetables and aromatics to your Dutch oven roast enriches the flavor deeply. These ingredients create a tasty base and keep the meat juicy. They also add color and nutrients to the dish. Choosing the right vegetables and herbs makes a big difference in taste. Let’s explore how to pick the best ones for your roast.
Choosing Vegetables
Pick vegetables that cook well with meat over long periods. Root vegetables hold their shape and develop rich flavors. Examples include:
- Carrots
- Potatoes
- Parsnips
- Turnips
Onions and garlic add sweetness and depth. Cut vegetables into even pieces for even cooking. Avoid watery vegetables like zucchini; they become mushy.
Herbs And Spices
Fresh or dried herbs bring aroma and complexity. Common choices are:
- Rosemary
- Thyme
- Bay leaves
- Parsley
Spices like black pepper and paprika add warmth without overpowering. Tie herbs in a bundle for easy removal after cooking. This keeps flavors balanced and clean.
Cooking Process
Cooking a roast in a Dutch oven creates a rich and tender meal that feels like a special occasion every time. The key lies in controlling heat and time carefully to bring out the best flavors and textures. Understanding how to manage your oven temperature and cooking duration will help you achieve a perfectly cooked roast with minimal effort.
Oven Temperature Settings
Set your oven temperature based on the size and type of roast. A moderate temperature between 300°F to 350°F (150°C to 175°C)works well for most cuts, allowing the meat to cook slowly and evenly.
If you want a crusty exterior, start with a higher temperature, around 425°F (220°C), for the first 15-20 minutes, then reduce it to the moderate range. This technique locks in juices while creating a flavorful crust. Have you tried adjusting the temperature mid-cook to perfect your roast?
Cooking Time Guidelines
The general rule of thumb is to cook your roast for about 20 minutes per poundat 325°F (163°C). However, this can vary depending on the cut and how well done you prefer your meat.
| Roast Weight | Approximate Cooking Time | Recommended Internal Temperature |
|---|---|---|
| 3 lbs | 60 minutes | 135°F (Medium Rare) |
| 4 lbs | 80 minutes | 145°F (Medium) |
| 5 lbs | 100 minutes | 160°F (Well Done) |
Using a meat thermometer is the most reliable way to check doneness. Don’t guess and overcook—your roast will thank you with juicy, tender results.
Checking Doneness
Checking the doneness of your roast ensures it is safe to eat and perfectly cooked. This step helps avoid overcooking or undercooking. Two main ways to check doneness include using a meat thermometer and observing visual and texture cues. Both methods give important clues about the roast’s readiness.
Using A Meat Thermometer
A meat thermometer is the most accurate tool for checking doneness. Insert it into the thickest part of the roast, avoiding bone or fat. Here are safe temperature guidelines:
- Rare: 125°F (52°C)
- Medium rare: 135°F (57°C)
- Medium: 145°F (63°C)
- Medium well: 150°F (66°C)
- Well done: 160°F (71°C) and above
Remove the roast from heat when it reaches 5°F below the target temperature. Residual heat will finish cooking it.
Visual And Texture Cues
Visual and texture signs help confirm doneness without tools. Check the roast’s color. A well-cooked roast turns brown on the outside. Pink or red inside means it needs more time.
Press the roast gently with a finger or fork. A rare roast feels soft and squishy. Medium rare is firmer with some bounce. Well done feels very firm and springy.
Juices also indicate doneness. Clear juices mean the roast is done. Red or pink juices suggest it needs more cooking.
Resting And Serving
After cooking a roast in a Dutch oven, resting and serving are key steps. Resting lets juices settle inside the meat. Serving it right enhances the taste and texture. These simple actions make a big difference in your roast experience.
Why Resting Matters
Resting allows the meat fibers to relax. This stops juices from running out when you cut it. The roast stays moist and tender. Rest for at least 15 minutes, covered loosely with foil. This keeps the roast warm without steaming it.
Carving Tips
Use a sharp knife to slice the roast. Cut against the grain for tender pieces. Slice evenly for better presentation and easy eating. Remove any large fat pieces if you want a leaner serving. Arrange slices on a warm plate before serving.
Troubleshooting Common Issues
Cooking a roast in a Dutch oven can sometimes lead to unexpected issues. You might find the meat dry or not cooked through as you hoped. These problems can be frustrating, but they are fixable with a few simple adjustments and techniques.
Dry Meat Solutions
If your roast turns out dry, it usually means it lost too much moisture during cooking. To fix this, try adding a bit of broth or water to the Dutch oven before covering it. This creates steam inside, helping keep the meat juicy.
Another tip is to baste the roast occasionally with its own juices or a bit of added liquid. This helps maintain moisture on the surface and prevents dryness. Also, wrapping the roast in foil after cooking can let it rest and reabsorb juices, improving tenderness.
Have you ever thought about adjusting the cooking temperature? Lower heat for a longer time can prevent the meat from drying out. High heat might cook the outside too fast while drying the inside.
Undercooked Roast Fixes
If your roast is undercooked, the best solution is to return it to the Dutch oven and continue cooking. Add a splash of liquid like broth or water to keep the environment moist. Cover the pot tightly to trap heat and steam.
Use a meat thermometer to check internal temperature regularly. This helps avoid overcooking while ensuring the roast reaches the safe, desired temperature. Resting the meat after cooking also helps the internal heat finish the cooking process.
Sometimes uneven heat distribution causes undercooked spots. Stir the juices around the roast or rotate the Dutch oven in the oven if possible. This can help the heat spread more evenly and cook the meat thoroughly.

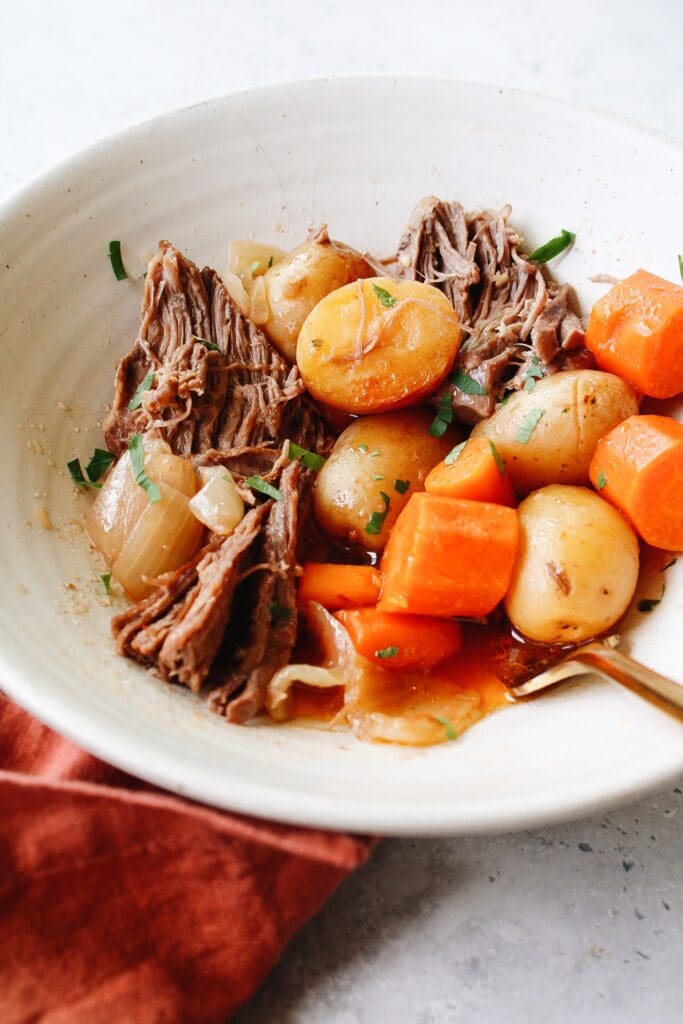
Credit: gratefulgrits.com
Enhancing Flavors
Enhancing the flavors of a roast cooked in a Dutch oven can turn a simple meal into a rich, savory experience. The Dutch oven traps moisture and heat, which helps deepen the taste. Using extra steps like making pan sauces or adding liquids can build layers of flavor. These techniques bring out the best in the meat and vegetables, creating a delicious dish full of aroma and taste.
Making Pan Sauces
After cooking the roast, the pan holds flavorful browned bits called fond. These bits are full of rich taste. Use a wooden spoon to scrape them up gently. Add ingredients like butter, garlic, or herbs to the pan. Stir to mix and melt the butter. Pour in a small amount of liquid to loosen the sauce. Let it simmer until thickened. Pour the sauce over the sliced roast for extra flavor.
Adding Wine Or Broth
Adding wine or broth to the Dutch oven helps build moisture and taste. Pour about one cup of red or white wine for a deeper taste. Broth works well too, especially beef or chicken broth. These liquids mix with the meat juices during cooking. They create a tasty base for the sauce. This step keeps the roast juicy and tender. It also adds a savory note to the dish.
Frequently Asked Questions
How Do I Prepare A Roast For Dutch Oven Cooking?
Trim excess fat and pat the roast dry with paper towels. Season it generously with salt, pepper, and your favorite herbs. This enhances flavor and helps create a delicious crust during cooking.
What Temperature Is Best For Roasting In A Dutch Oven?
Preheat your oven to 325°F (163°C) for slow and even cooking. This temperature tenderizes the meat while keeping it juicy and flavorful throughout the process.
Can I Cook Vegetables With The Roast In A Dutch Oven?
Yes, add root vegetables like carrots, potatoes, and onions around the roast. They absorb delicious flavors and cook evenly alongside the meat, making a complete meal in one pot.
How Long Should I Cook A Roast In A Dutch Oven?
Cook time depends on roast size and type. Generally, plan 20 minutes per pound for medium doneness. Use a meat thermometer to check for an internal temperature of 145°F (63°C).
Conclusion
Cooking a roast in a Dutch oven is simple and rewarding. You just need a few ingredients and some patience. The Dutch oven keeps the meat juicy and tender. You can add vegetables to make it a full meal. This method suits both beginners and experienced cooks.
Try it for your next dinner and enjoy a warm, delicious meal. With practice, you will find your favorite flavors and techniques. Give it a chance and enjoy the cozy taste of home cooking.